


This project isn’t 100% done because I am figuring out what design plan I want to do for a bench under the hooks. But I thought sharing this quick project and breaking up the entrance redesign into two posts (wall treatment + DIY bench) will be great because I’ll be able to share how to build a bench when I get around to that project. 😉 I’m currently working on fixing up the bedroom with more board and batten trim, crown molding, and a sliding barn door! So my hands are a little tied! I have plenty of other DIY projects to share in the meantime, especially this quick, budget-friendly, and EASY project I’m sharing today!!
So get this … I didn’t cut a single board for this project! Because the space was relatively small and mostly because I didn’t take my parent’s miter saw down to Florida with me, Lowes was so gracious enough to cut down my boards to the requested lengths! So lucky for you if you don’t own a miter saw, this project can be done!! 🙂
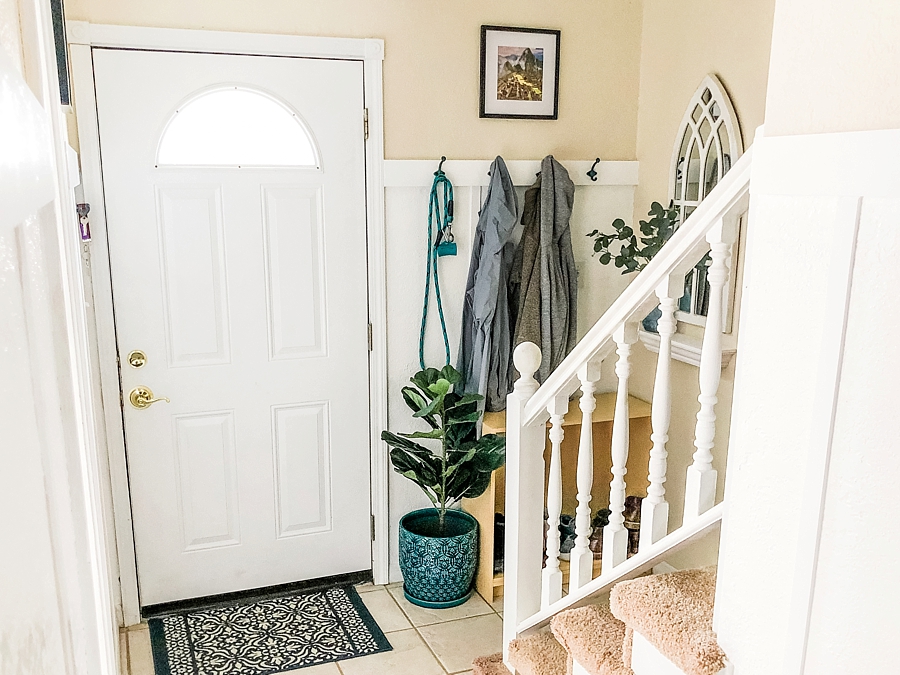
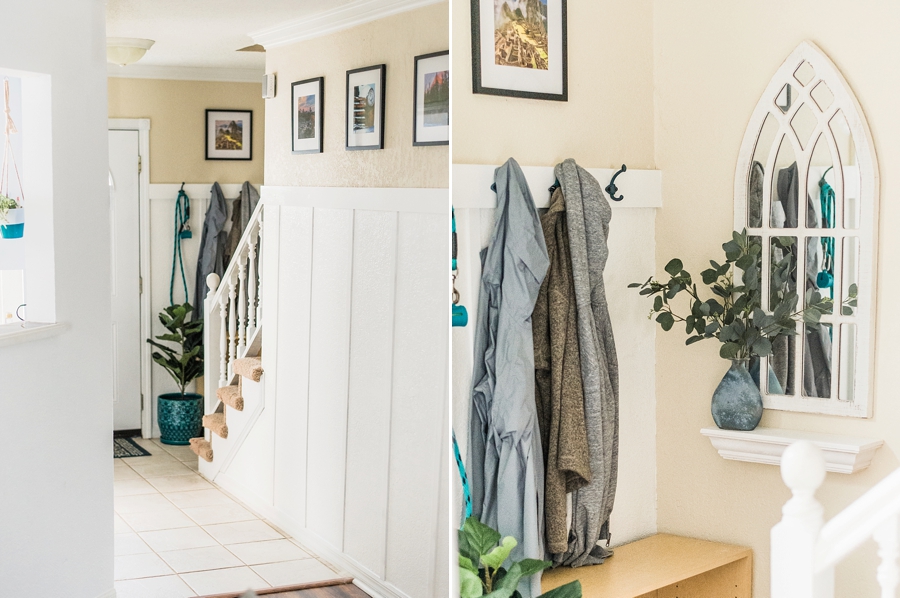
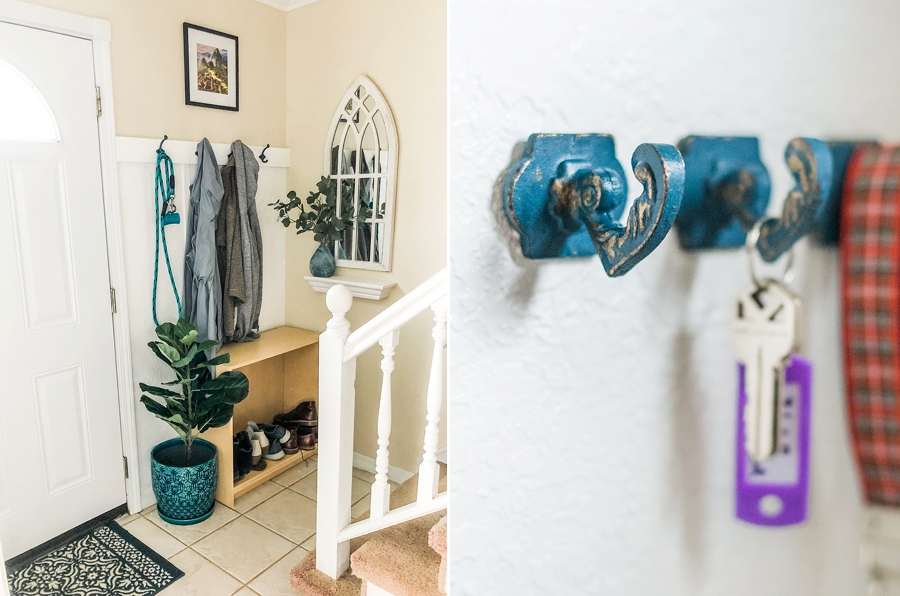
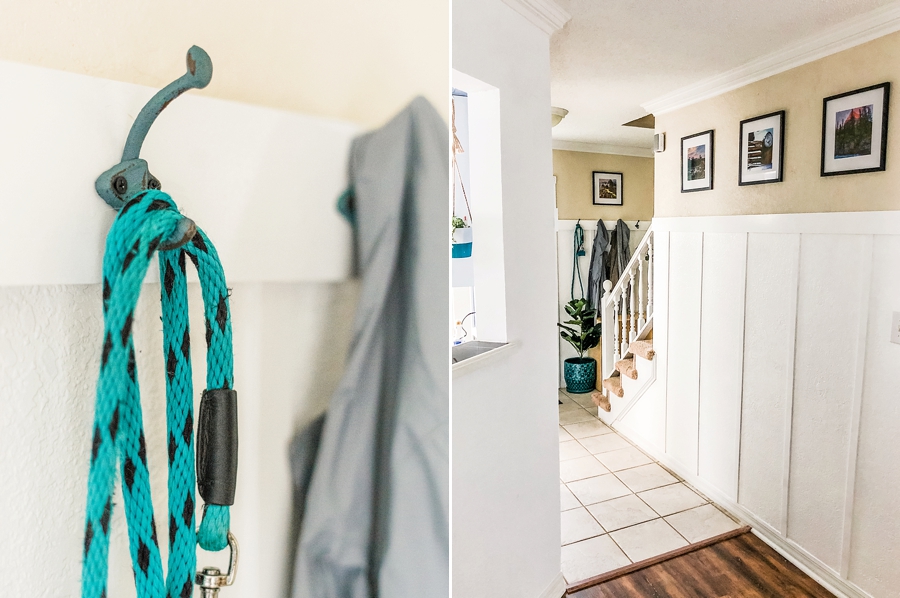
What inspired me to do this board and batten wall treatment in the foyer? I saw there was a problem! When Alex and I walked into the house, there wasn’t a good place to put jackets or Ollie’s leash or our shoes. Being that Alex’s house is at the beach, it’s nice to kick shoes off at the front door before tracking in any sand. I thought I definitely needed to install some wall hooks for our jackets so we aren’t draping it over the stair banister (yes, that started to become my normal routine which isn’t very pretty or functional). But of course, I couldn’t just install hooks without it looking a little more polished. 😉 That was when I was inspired to install the board and batten style trim to about eye level height to hang jackets/coats/Ollie’s leash! I was only going to do two small walls next to the door, but at the last second I decided to continue it down the hallway to give it a little extra UMPH! I’m so glad I decided to continue it down the hallway because we can see it from the living room which is a nice offset from the joining rooms. Let’s dive into how you can conquer this project!
Supplies needed
** I would generally say a miter saw — But I cheated and had Lowes cut the boards this time
1 x 4 Pine boards (Horizontal boards)
1/2 x 2 Pine boards (Vertical boards)
Stud finder
Leveler
Measuring tape
Finish nails (2.5″ nails for the horizontal boards and 1.5″ for vertical boards)
Hammer
Caulk
Semi-gloss white paint
Paintbrush, roller, tray, tarp
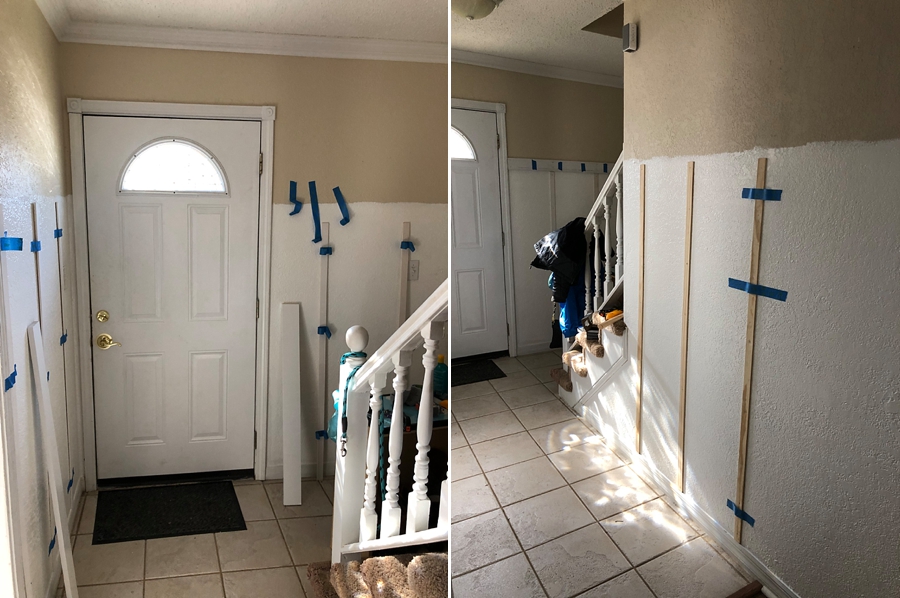
1) Paint bottom portion of the wall white up to the desired level (I did a little over four feet from the baseboard trim)! Where the white paint meets the colored paint on the wall doesn’t have to be pretty because the 1×4 board will mask the line when you install it. To make sure I was within the desired area without taping the entire foyer, I just simply marked the wall with an inch worth of painter tape every foot or so! If you want to paint the top portion of the wall, this is also the time to do so before the trim gets installed. 🙂
2) With a stud finder, mark every vertical stud with a piece of painter tape (should be every 16-inches). Count how many 1×2 pine boards you’ll need to buy based on how many studs you marked/what looks balanced. We want the space in between boards to look evenly dispersed throughout the room while properly securing the boards to the wall so hitting a stud is crucial. After you take measurements for the horizontal boards and count how many 1×2 boards you’ll need, it’s time to go shopping!!! ** Again, if you don’t have a miter saw, have Lowes/Home Depot cut it down. 🙂 But note that if you have more than 10 boards to cut, you might need to pick it up the following day! Also, there is a cutting fee to keep in mind.

3) Time to get to work and install the 1×2 vertical boards!!! I initially secure the boards to the wall by using painter tape. Use a leveler to make sure it’s straight! I personally like to hang an entire wall of the vertical boards before I nail them into place. After you have them in place, and if you have a nail gun, USE IT! Otherwise, you can use a hammer/finish nails and hit those studs! I used about 5 nails up the board to make sure it’s fastened. Do this all around the room. 🙂
4) Take your 1×4 pine board and sit it horizontally on top of the installed vertical boards. It’s okay if the boards beneath aren’t butting up against the board to a tee because that’s where caulking becomes our friend!!! 🙂 Fastened the 1×4 board in place by again, hitting the studs (use the vertical boards as a reference)!
5) Once your boards are secured, caulk the seams and nail holes! I don’t like caulking/sanding, so one trick I learned a while ago is to caulk the desired area and take a wet finger to smear the excess away. Time saver!!
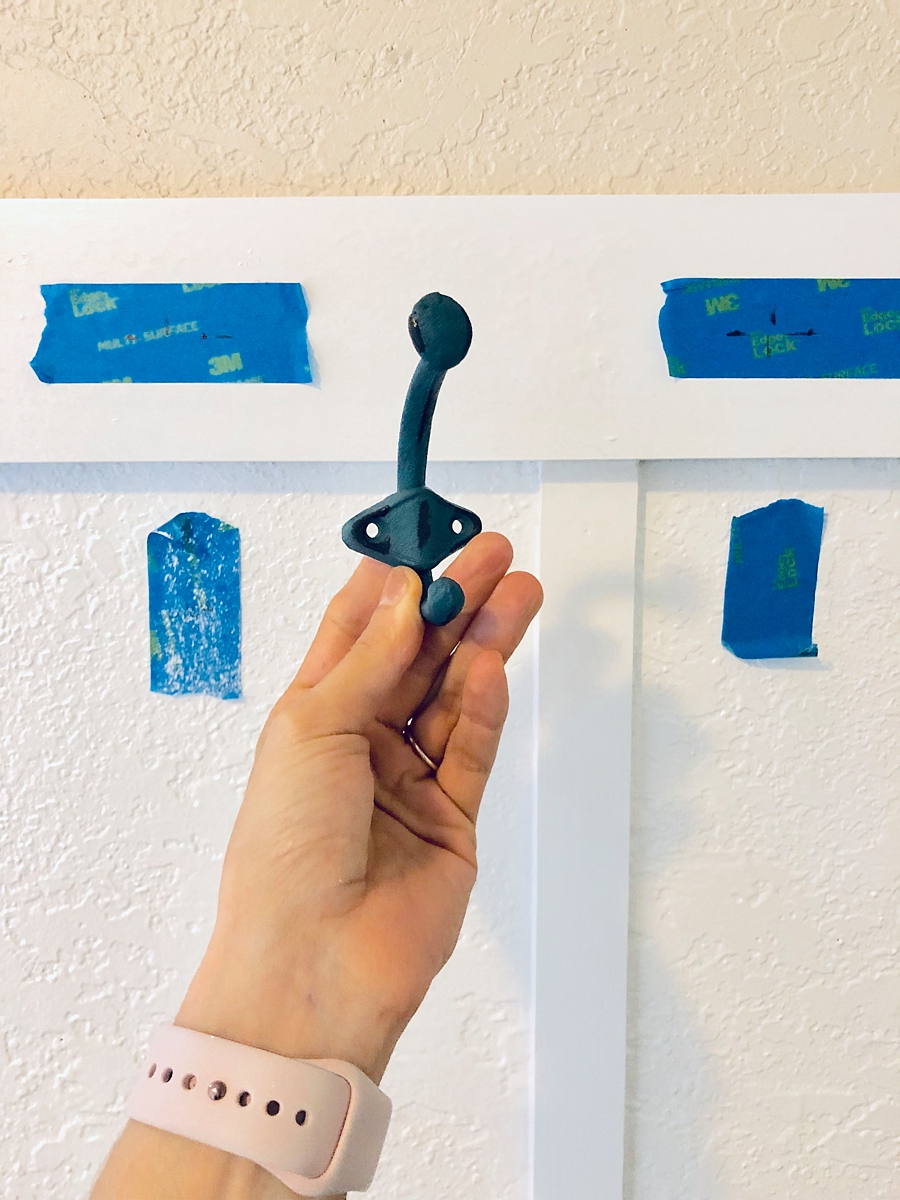
6) After caulk dries, paint your boards with semi-gloss white paint!!!! DONE! A super easy project that makes a great impact!!! I added the hooks (bought them from Hobby Lobby for a buck fifty each!) and a couple other design elements, but I cannot wait to make this little corner cozy with a little bench for proper shoe storage!!! 🙂
Here are the results!!!
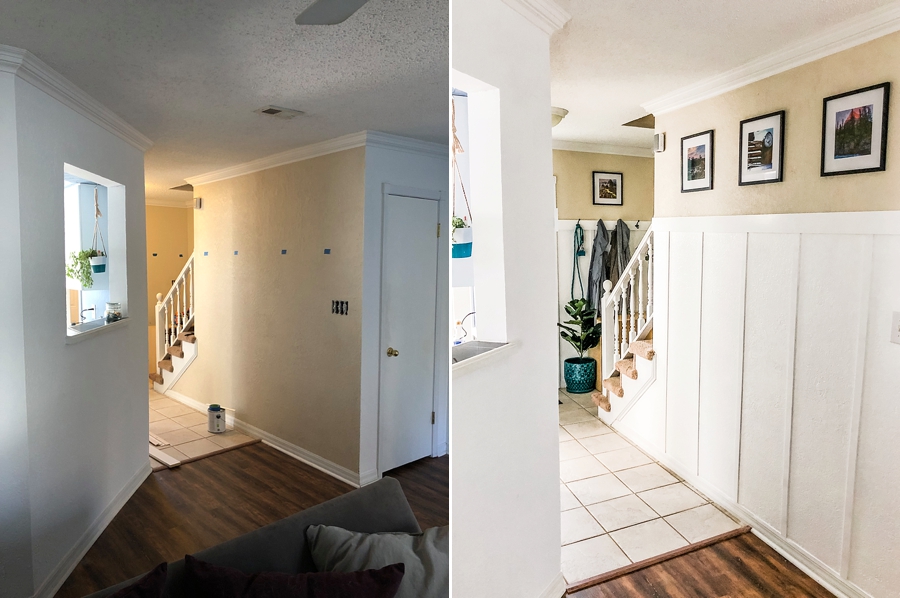
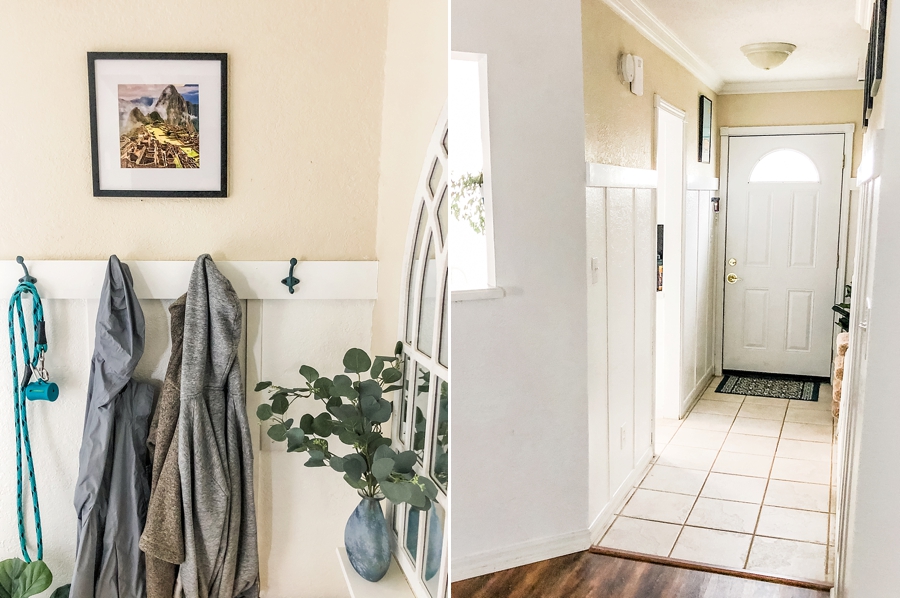
BEFORE + AFTER
I LOVE that we were able to feature some of Alex’s incredible photography in the entryway!!!!
Next project??? Build a bench under the coat hooks to also hide shoes away!!! 🙂 Also, you cannot see the placement of these key hooks next to the door, but again, thanks Hobby Lobby!!!!

I hope this inspires you to tackle this super easy and affordable project somewhere in your own home. 🙂 It makes a difference!!!


+ COMMENTS
add a comment