


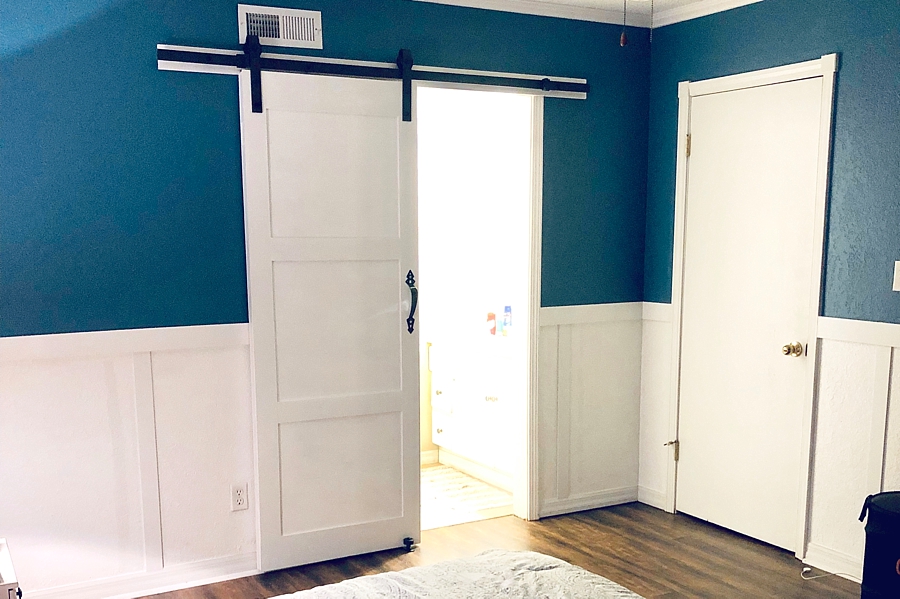
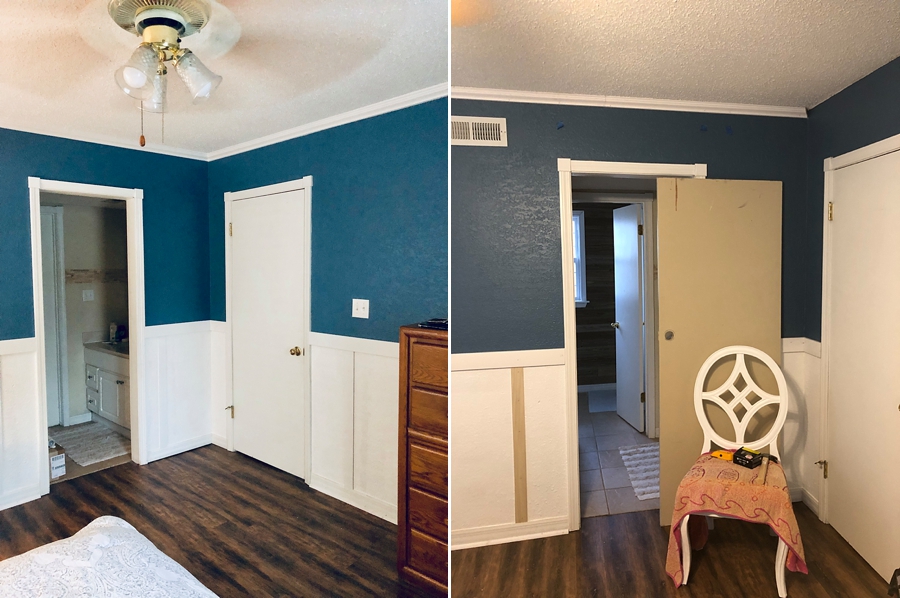
I was asked by several followers to post about the recent barn door I hung in Alex’s house!! 🙂 Although, I wish I had professional photos and a staged room to share with you … But hey! This is real life! 😉 His bed is on the ground and there isn’t one photo hung in the room, but I can’t wait to move down there after we get married this summer and go crazy decorating to make it homey!!! Cannot WAIT!
It’s nice having an ensuite bathroom, but we thought a barn door might be a nice feature to block any light/sound from the sink area, especially at 4 a.m. when Alex gets up for work. So I went to work and made this project more affordable than buying a ready to go barn door kit! I bought a $15 old door from Restore and a $40 barn door track on Amazon!
The trim I decorated the door added up a little bit, but it really transformed the door! I picked up trim boards that were 1/2″ x 6″ for the horizontal top/bottom part of the door and 1/2″ x 4″ for the vertical boards and two middle horizontals. I did this on both sides of the door, but you could get away with just one side if you want to keep the cost more affordable! Shopping for the handles were fun and that ended up costing around $12 for two black iron grips for both sides of the door!
I bought the hardware and read through the instructions before strategizing the plan! I’m sorry I didn’t take too many photos of the process I went through, but I actually created another blog post on how to decorate a door HERE!!! Caulk and paint is my best friend!! 😉 This door was the perfect width to cover up the door opening, but I needed to extend the length to the door I picked up so it completely covered the door opening. I nailed a piece of trim wood that was as thick as the door along the bottom of the door and covered it up with trim so you cannot see it. 🙂 I liquid nailed/finished nailed the cut trim boards on the door and finished with caulk/paint on both sides before moving on to hanging it!
Don’t take the numbers seriously below in the sketch, but you can see that it’s imperative to read through instructions, draw, measure, and create a list of supplies needed! That helped me get through this project seamlessly!

I used a crowbar, wedged off the top trim of the door frame, and screwed in a 1×6 wooden header in the studs. The MDF board at Lowes was the cheapest option and it was already primed/painted white! Bingo!! Keep in mind that with the 1″ header piece will bring your door further away from the wall. It worked out perfectly in my case because I added trim on both sides of the door which made it thicker than a typical door and closed in the gap between the door and door frame trim. If you want to see a great tutorial I referred to when I was planning out this project, check it out HERE!!!
The roller at the base of the door was SUPER easy to install (fortunately) and it’s so necessary because it keeps the door from swaying away from the wall. 🙂 If you want the same barn door track, I bought it for $40 on Amazon HERE!!! The bottom roller was also purchased HERE on Amazon for $9!
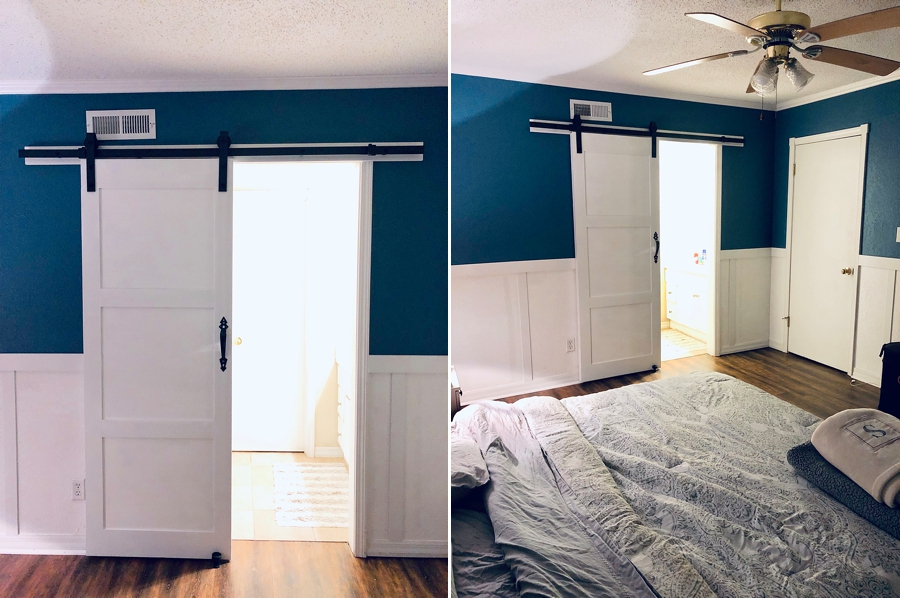
I love the results and cannot wait to go down there to really make the room homey and cozy (with professional photos)!!!


+ COMMENTS
add a comment