


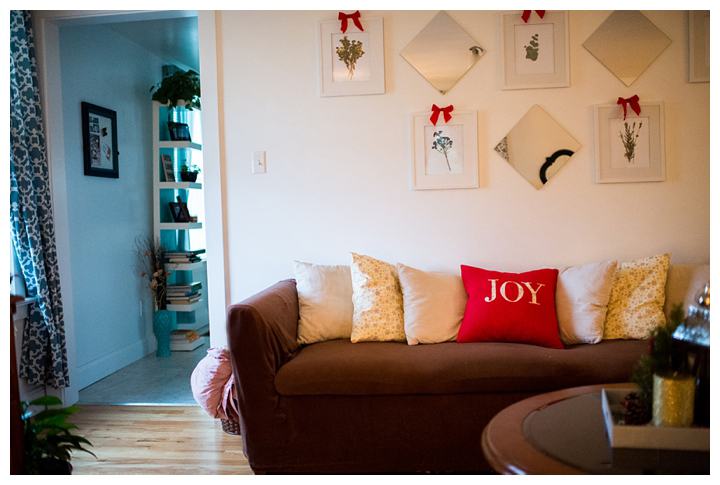
Oh it’s the most wonderful time of the year! I. LOVE. CHRISTMAS. And when it comes to decorating, oh I’m in heaven! This will be the first Christmas in my new place, so I realized on the way home from my Florida vacation last week that I need basically everything for Christmas since I have zero supplies/decorations. On my 13+ hour drive home, I roamed on Pinterest where I was filled with inspiration and ideas! So I guess you can say that when you walk into my house that Pinterest and Target decorated my house? Lol! Anyways, I knew that I did not want to spend a fortune decorating, but I also really wanted a FESTIVE and cheerful space. Decorative pillows can be a little pricey if you are purchasing many at once. I went the alternative way and chose to make pillow slips so I can use them from season to season with the same pillows I use off season! The other plus side is that I won’t need to find space to store extra pillows and it cut cost to me paying less than one decorative pillow at Target! It’s a win-win-WIN situation! I made a total of six pillow slips! The 2 red appliqué decorative and 4 gold snowflake pillow slips. And you heard right … for the cost of less than one decorative pillow at Target!
Supplies you need: Pillow Desired fabric (suggest 2 different colored fabrics: one for the pillow slip and one for the decoration) Thread matching colored fabric Design or type printed on regular paper Tape Measurer Iron + Ironing board Scissors Fusible web (just enough for your design) Quilting pencil or anything that will similarly work Pins Sewing Machine
First, always start out by ironing the fabric so you have a clean canvas to start with with no wrinkles. Measure the pillow you want to use across the front side from left to right with a tape measure. Mine measured to 20 inches. So I planed to cut out one front panel of 20×20 since it is a square pillow and with 1/2 inch seams it will fluff up and bring in the pillow so it sits 19″ across. Snug fit is good as you do not want a loose pillow slip! And because this is a slip, I needed to cut out two 12.5×20 panels so they overlap 4″ over each other to ensure the pillow won’t mistakenly slip out of the case. Take the two 12.5×20 panels and sew up one long side with 1/2″ seam. This part will be the opening of where you stuff in your pillow. You only need to sew up one side per panel because the other sides will be sewed together when you put together the pillow. Now all of the panels are ready to go! But now it is the fun part! If you want to put together any decorative appliqué, I highly suggest it! Definitely worth the time! 🙂 You don’t even necessarily need to do a type like I did … you could use a reindeer or a Christmas tree! I went to my computer and simply printed out what I wanted to use. Before doing this, make sure you know that you will not want the design to be anything over I would say 16×16 at the largest. After printing out your design to the appropriate sizing, cut it completely out.

Take the desired fabric of choice you want to use for the design and iron on the fusible web. Please be sure you know the proper use of fusible web as you will not want to end up with the stuff sticking onto your ironing board or even worse … your iron. You just need the nonstick mat that is suggested with it! 🙂 No biggie! I was able to take the cut out letters and place it on the fusible web to figure out how much I would need and then ironed it onto non-decorative side of the fabric that way. Because my design is considered wimpy as for how much area it is covering, I ended up doubling up on the fusible web to make sure it sticks on my pillow. After ironing on the fusible web, take your cut out design and place it on top of the decorative side of the fabric (make sure the fusible web is lined up with your design) and it is time to trace! Hold down your paper design in place and trace with a quilting pencil or something that will help guide you when it is time to cut. After tracing your design and flipping the fabric over to make sure the fusible web covers the space you traced over, it is now time to cut out your design! I took a short cut with this as I allowed the fusible web to let my design stick to the pillow instead of sewing around the design edge. That would be not necessary and VERY tedious! Haha!
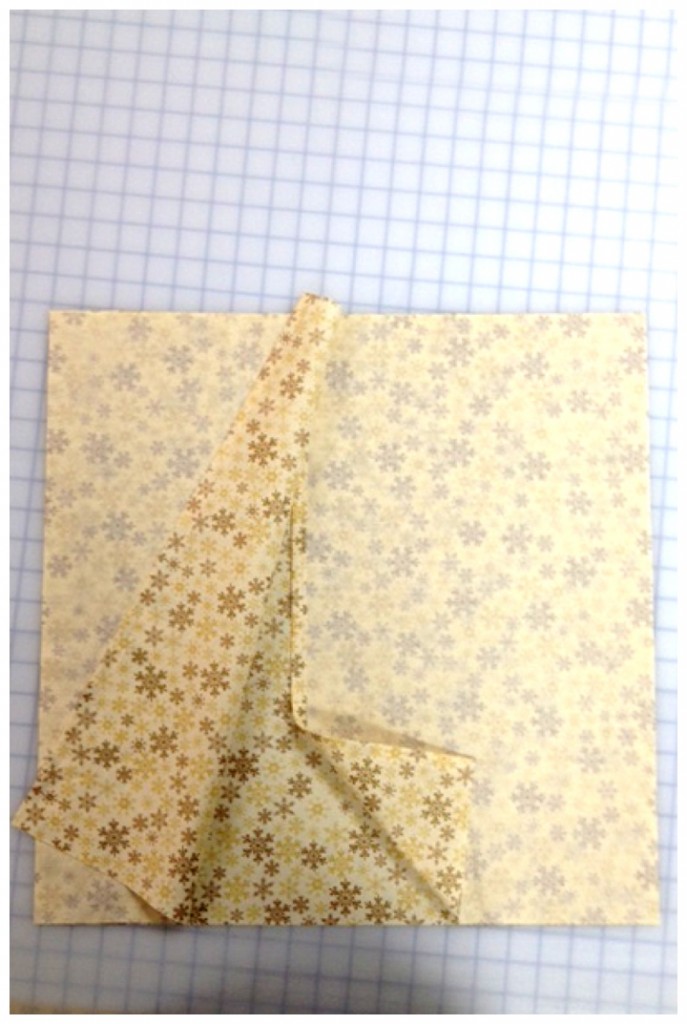
Alright, we are almost done! 🙂 After the design is cut out, take your 20×20 panel and find the center. Lay your design where you would like it and it is time to iron the design on! The fusible web should mold with the panel and allow your design to stick. Yay!
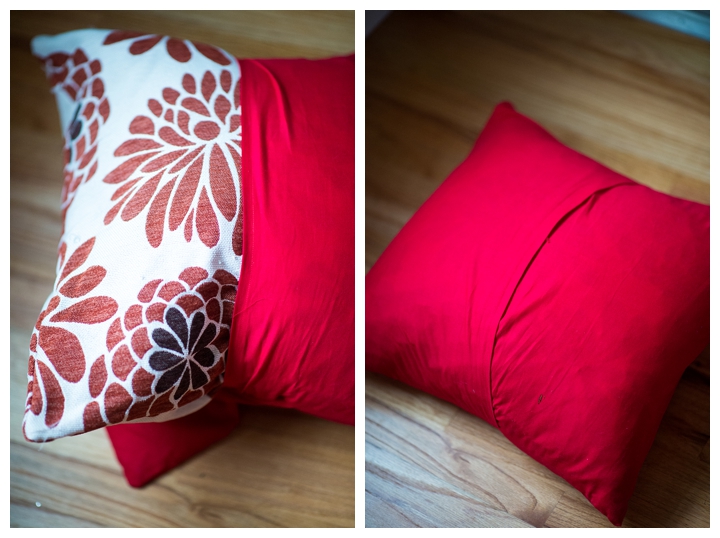
Now time to put the entire pillow together! Make sure that your fabrics are facing into each other. I sewed my fabrics together with the decorative sides facing in towards each other because in the end you will end up flipping the case inside-out so the thread is not showing. After you have pinned all around the panels, it is time to sew! Sew all four sides and once you pull it off the sewing machine, flip it inside-out and WAHLA you have a Christmas decorative pillow slip!
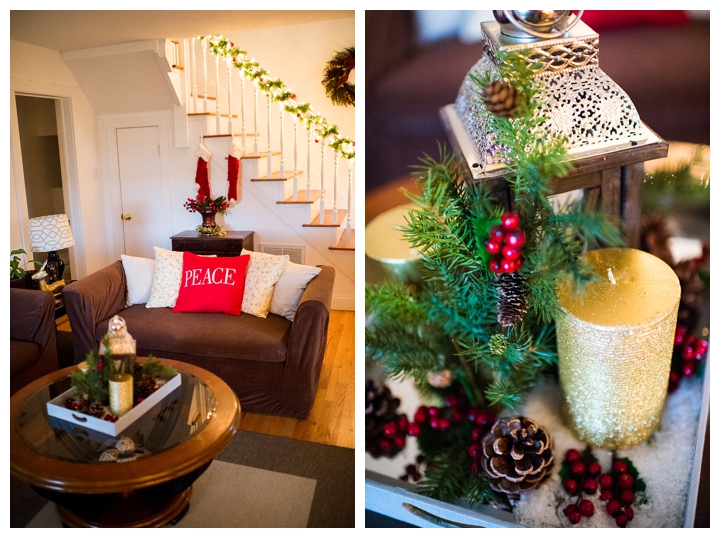
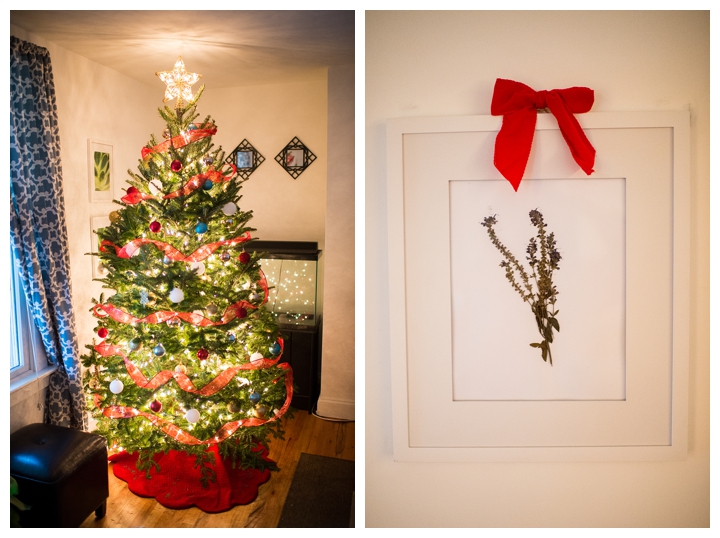
Just completed our tree yesterday! Yay! Coming together! 🙂 To the right is another project I did a few months ago and will just have to do a blog post on that in the near future! But I thought I would add some Christmas cheer to this wall above the long sofa and add some red bows above the frames. 🙂
 I hope you find yourself wanting to try this out! 🙂 It’s fun and well worth it! Merry Christmas!!!


+ COMMENTS
add a comment