


If you are like me, you love DIY projects! This past Christmas, I had a BLAST making gifts for my family and friends. Sometimes it can be hard to put the time of thought and creativity, but I have a cute little idea for you to include in your next baby shower gift! There are so many options of personalizing it too, whether by color, print, texture, embroidery, etc. I have a very simple example below that is SUPER easy and something that is always unexpected at a baby shower! I originally found the idea on Pinterest. Etsy sells a ton of these cute nursery door latch covers, but I thought why not take the time and actually do it myself! 🙂
Here’s a simple tutorial how to make a nursery door latch cover!
Supplies:
Two cotton fabrics (4 1/2″ x 2 1/2″)
Two colored ribbon (18″ each)
Thread
Pins
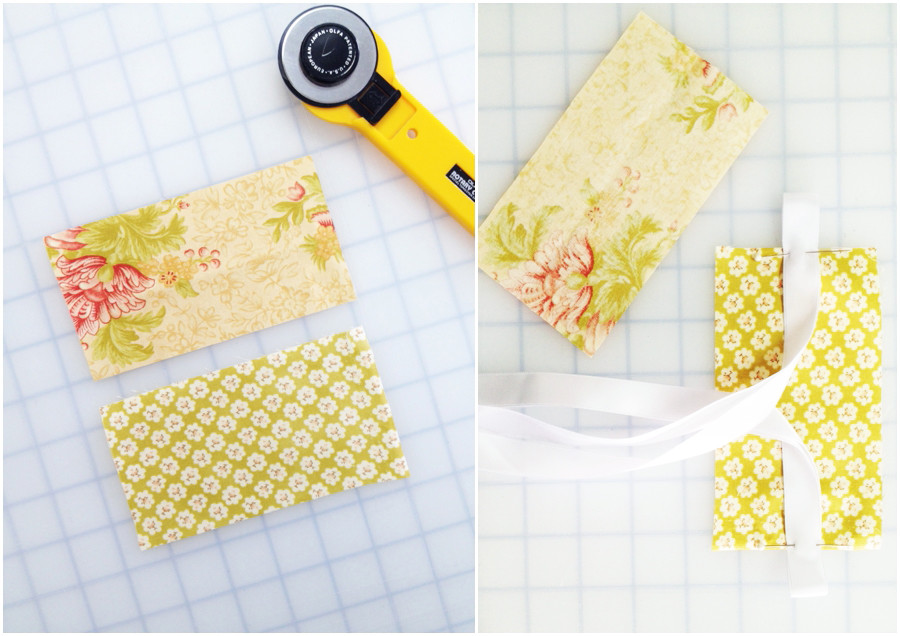
Cut two rectangles of your choice of fabric (4 1/2″ x 2 1/2″ each). I advise a cotton fabric. If you absolutely have to use a particular fabric, but is stretchy, I would attach a stabilizer to make it sturdy. Take one of your fabrics and place it on the table with the good side of the fabric visible. Place the other piece of fabric off to the side with the good side of the fabric facing down (as shown in the right photo below). Now, there are different ways to attach the cover to the door knob, I personally love the ribbon. 🙂 Cut out TWO 18″ colored ribbon of your choice. Take the ribbon, fold in half and pin the folded end to the good side of the fabric you first laid out (as shown below). Bring the ends of the ribbon in one direction, like below, so you can prepare to pin the fabrics together. Take the piece of fabric that is off to the side and place on top of the assemblage, again with the good side facing down. Pin together and sew with a 1/4″ seam. Do not sew all the way around as you will need a way to turn it inside out (next photo).
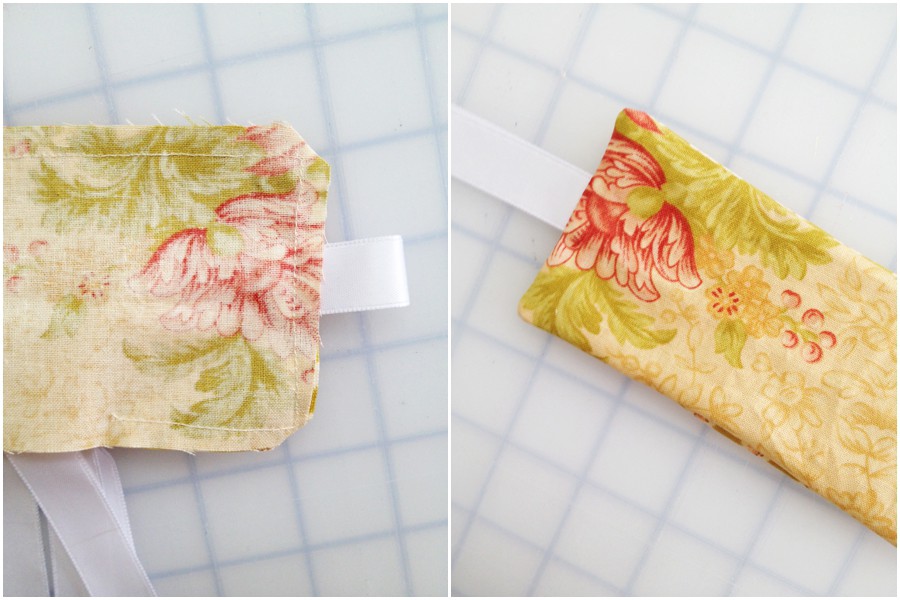
As you can see in this left photo below, I did not sew the part with the ribbon ends dangling. Before you turn your creation inside out, clip the corners so they are not bulky. Now turn inside out and you should have something that looks like the right photo below. The part that isn’t sewn, pin together shut. Take this back to the machine and sew a 1/4″ seam so now the cover is completely sewn around.
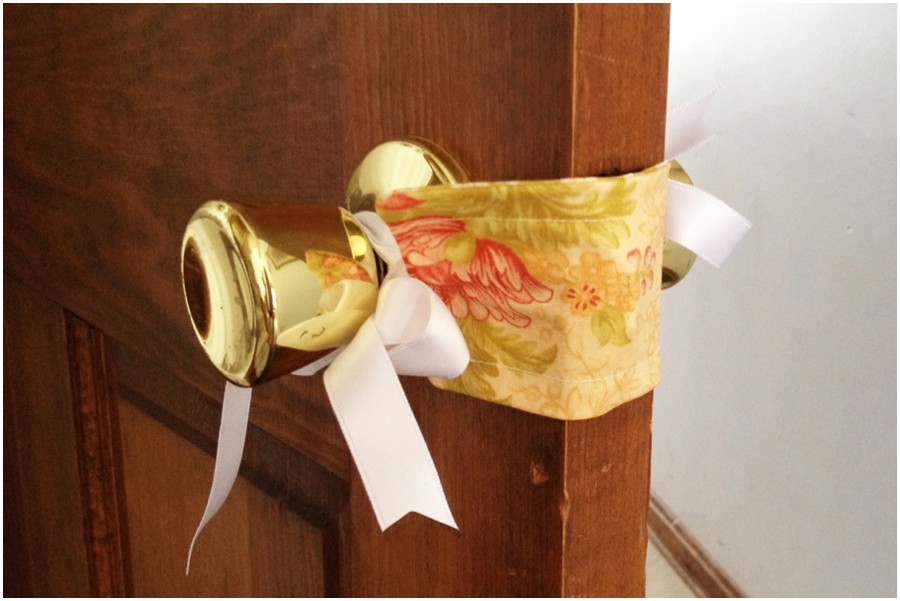
 Yay! Now you can softly walk in and out of a room without the door knob clicking! Perfect for the nursery room. 🙂


+ COMMENTS
add a comment