


Last year was full of projects around my new home and this year is just the same. 🙂 Although, the list is minimal this year so I’m able to focus on bigger business projects, but I’m excited to share my journey with you all over the next few months. I’m a fan of DIY projects and if you’re the same, then you’ll find this project easy!
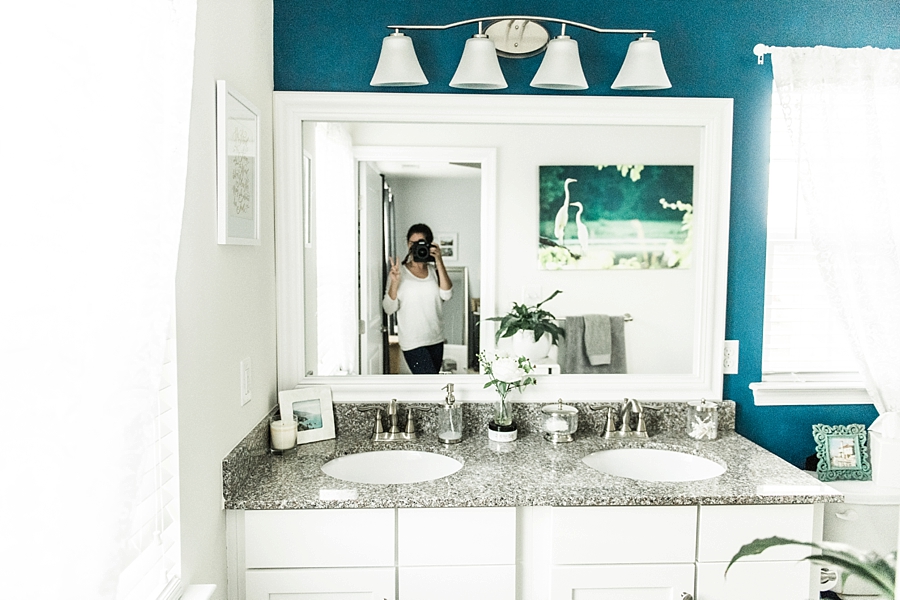
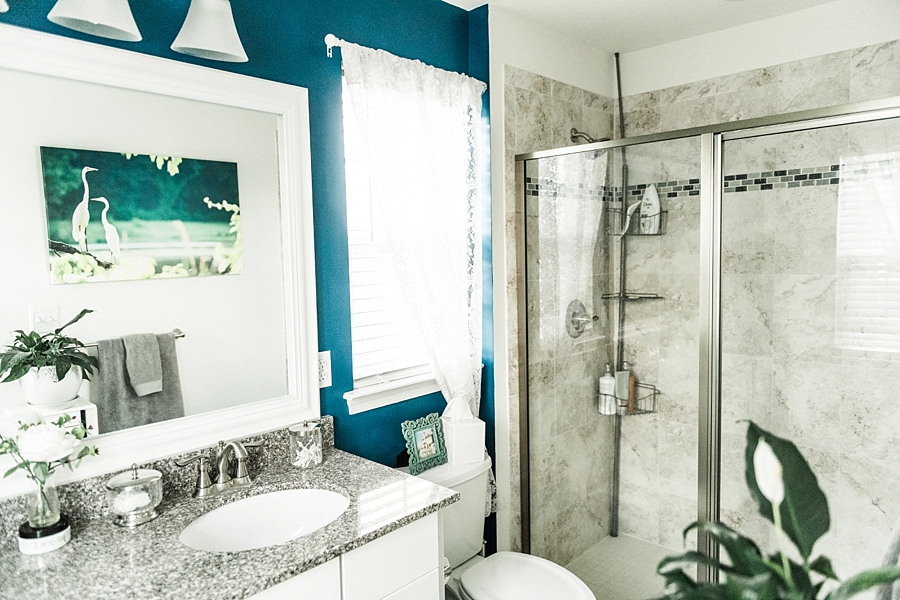
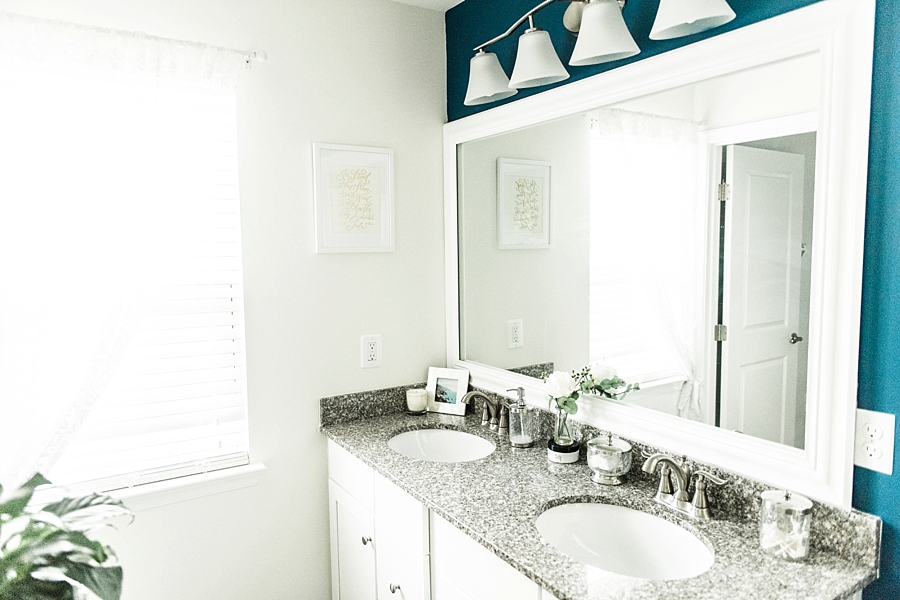
When I bought my home, I didn’t really have the intention of doing anything to my master bathroom, but after the new year, I started brainstorming projects to do around my home. Painting the bathroom and adding a frame around the mirror would make a difference without it being time-consuming or breaking the bank. Surprisingly, things have been a little busy on my end between planning the Runaway Brides 5k Fun Run and business tasks for this year. So this project was the first one to conquer and I love the results! 🙂 A year ago, I would not have chosen a dark blue for my bathroom, but after living in a gray and white home, an accent wall of color is a nice surprise! Plus, the gray tones throughout my home are on the blue side, so it flows.
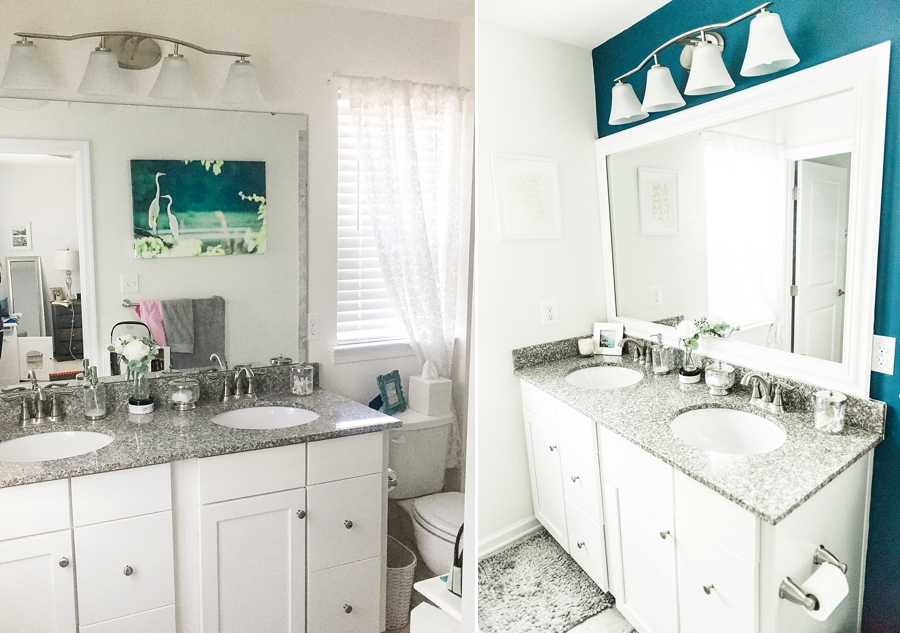
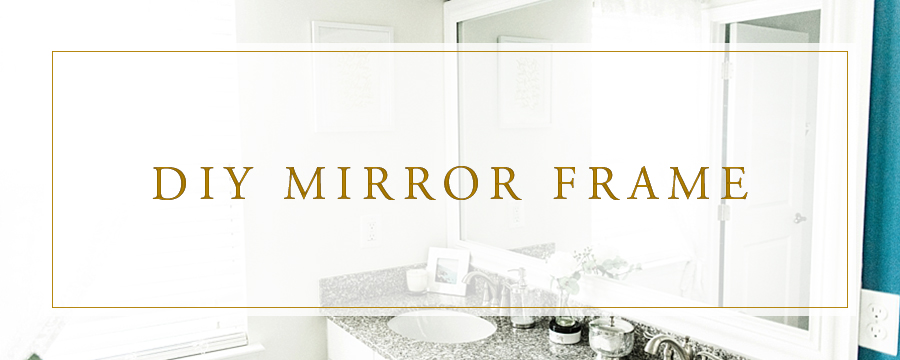
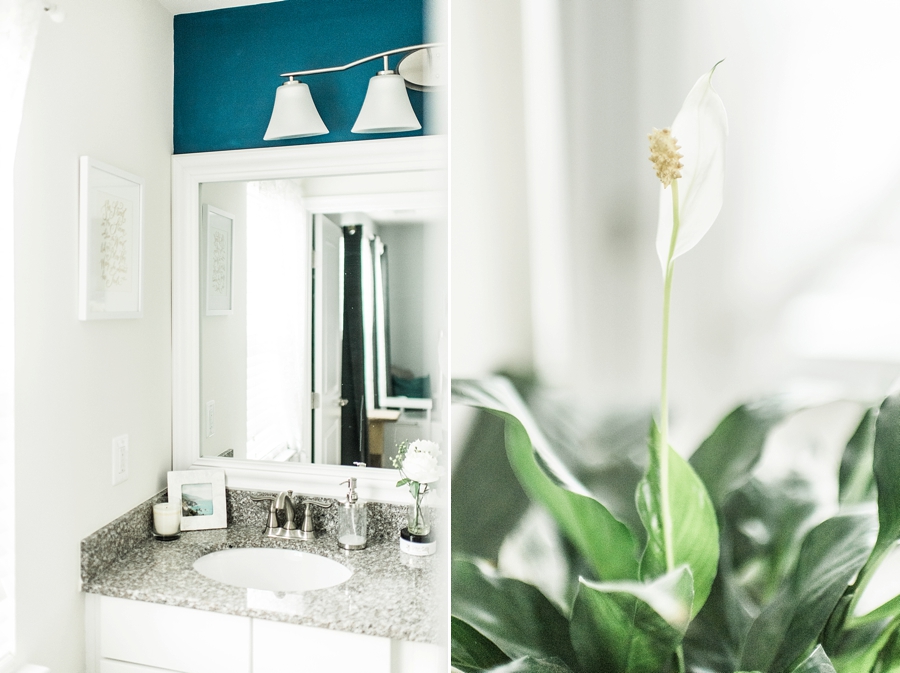
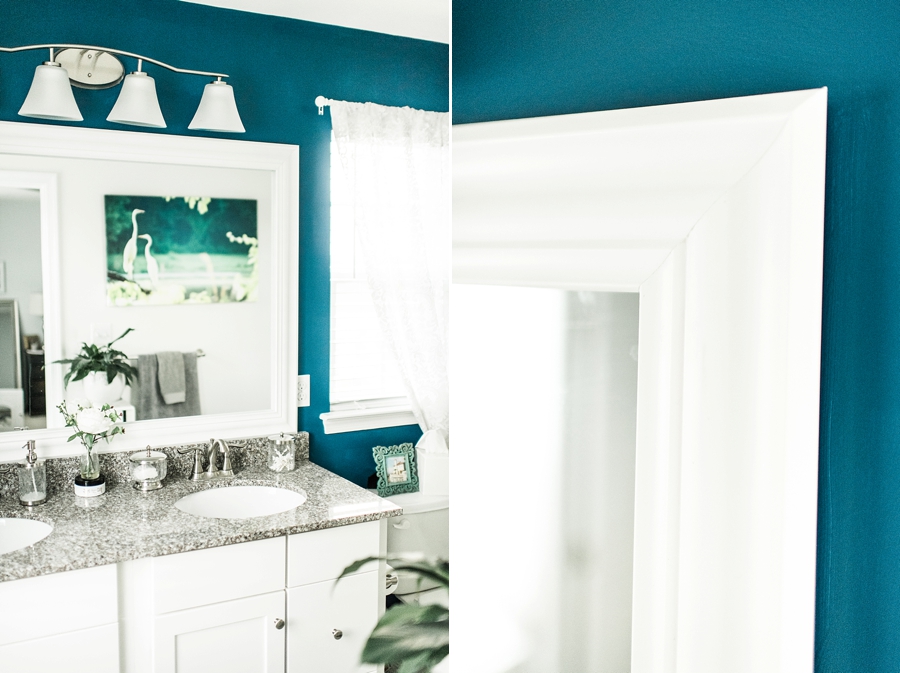
Do you want to know how to make your builder grade mirror into something pretty? I have to say that I love the white frame against the dark blue wall! Great contrast and the light still bounces around the room nicely since I chose to do an accent wall instead of the entire room. 🙂
What do you need to complete this mirror project after painting the bathroom?
– Moulding — I used a white/primed crown moulding from Home Depot
– Miter Saw
– Pencil
– Measuring Tape
– Caulk Gun
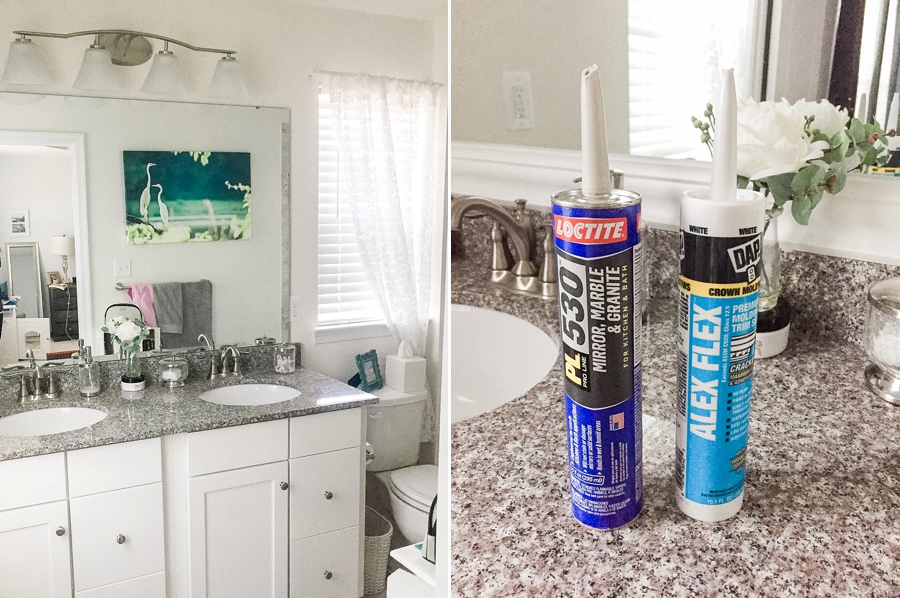
– DAP Caulk
– Loctite Mirror Glue
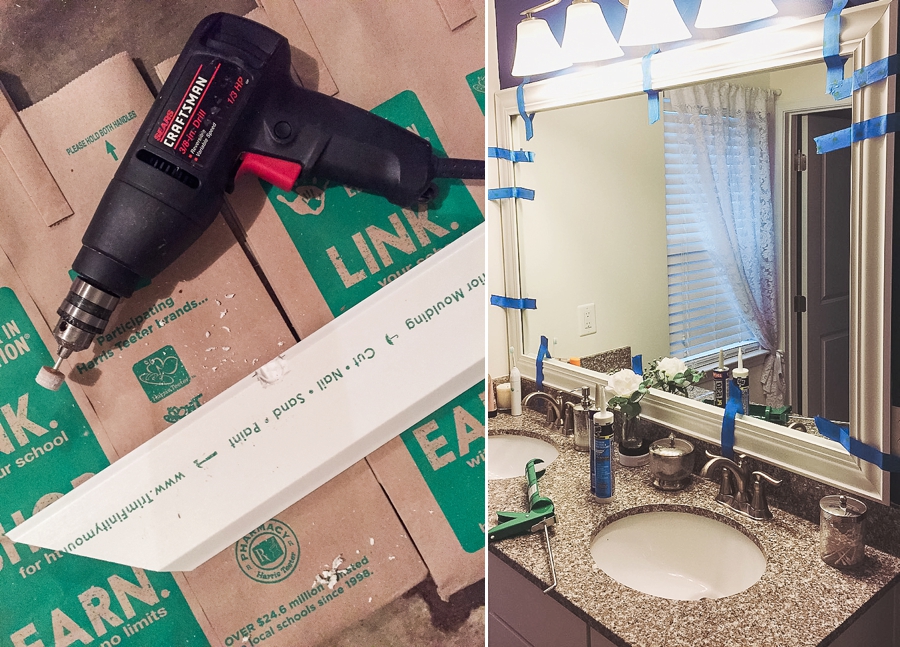
– A tool to carve out back sections of moulding to avoid the mirror clips (I used drill bit to shave away the moulding)
– Protective gear when cutting trim — Breathing mask, eye gear and ear plugs.
– Painters Tape
Create Your Own Mirror Frame
 1. Write down measurements (width and length) of the mirror.
2. This is important — If you want the frame to sit flush against the mirror, you need to take into account the mirror clips holding the mirror against the wall. Also, measure the W/L/D of the clip AND the distance from each side. I made sure to gauge the distance from the edge for all four of the clips because they were all different.
3. Purchase supplies and cut down the moulding at Home Depot to the desired length + a little extra just in case. I added an additional 5 inches to each of my cuts.
4. Take your measuring tape and draw out the length for each piece of moulding. ** BE SURE to keep in mind the side you want facing in or out. For example, I chose to have the big lip part of the moulding to be on the outside. This is going to be important when you cut your 45-degree angles. To help me, I drew the angle of the cut I needed to make right next to my measurement on the moulding. I also wrote “top”, “left”, “right” and “bottom” on the backside of each piece. Make sure you lay it out on the ground and see if the angles work, just in case!
 5. It’s time to cut! Set your miter saw at a 45-degree angle and start cutting (results above)!
6. After your cuts have been made, measure and draw out a section to carve in the backside of the moulding to avoid the mirror clips. Again, be sure you keep in mind where the clips are located on the bottom and top piece of the trim (you have to reflect the measurements since you’re working on the backside of the trim).
7. Carve/shave down the section you drew out and keep in mind the depth of the clip (photo below). I used a drill with a shaving drill bit to do this. ** Do not dig in too much; otherwise, you have the chance of breaking the front side of the trim.
8. Test out your pieces and make sure they fit together and form a perfect rectangle/square (whatever the shape of your mirror). Also, test out the pieces and see if they fit your mirror.
9. GLUE time! Take your caulk gun with the Loctite Mirror Glue and spread out the glue in the middle of the trim. **Don’t go too much towards the edge; otherwise, it might spill out when you press it against the mirror.
10. Use painters tape to hold the trim against the mirror.
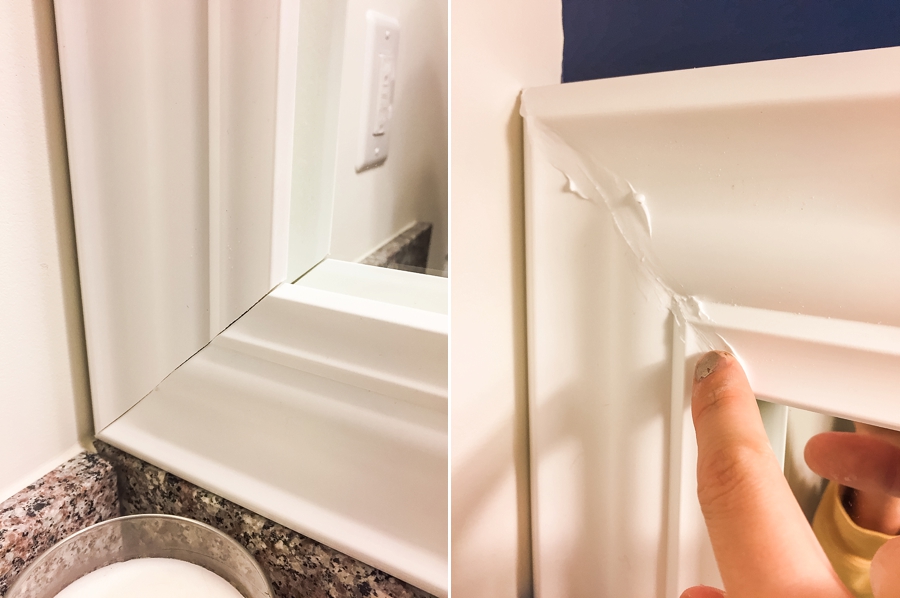
11. After the trim sits for 24-hours, it’s safe to caulk! I waited because I wanted to make sure the frame was settled and wasn’t going to slightly shift. Grab some paper towels and your caulk in the caulking gun. I spread the caulk on the gaps where the two pieces of trim met at the corner and smoothed it over with a wet finger. Wipe off the excess with your finger and wipe it on the paper towel. Make sure the seam is seamless with the caulk filling in the gap and let it dry (photo below).
12. After 48-hours, you can take off the painters tape! DONE!!!
After Photos
I love how the blue continues around the corner from the accent tile in the shower!
Smoothed corners with no gap! *thumbs up*
I hope this inspires you to take on a DIY project around your house. 🙂


+ COMMENTS
add a comment