


Do you have a part of the house that isn’t functioning well? Maybe you have a little nook next to the doorway that solely collects shoes. Why not make it a mini mudroom? Or perhaps you have an empty wall just around the corner from the kitchen that doesn’t serve a purpose. Why not build storage for those kitchen supplies and pantry items? That’s why I’m excited to share with you how to build a butler’s pantry in 6 steps!
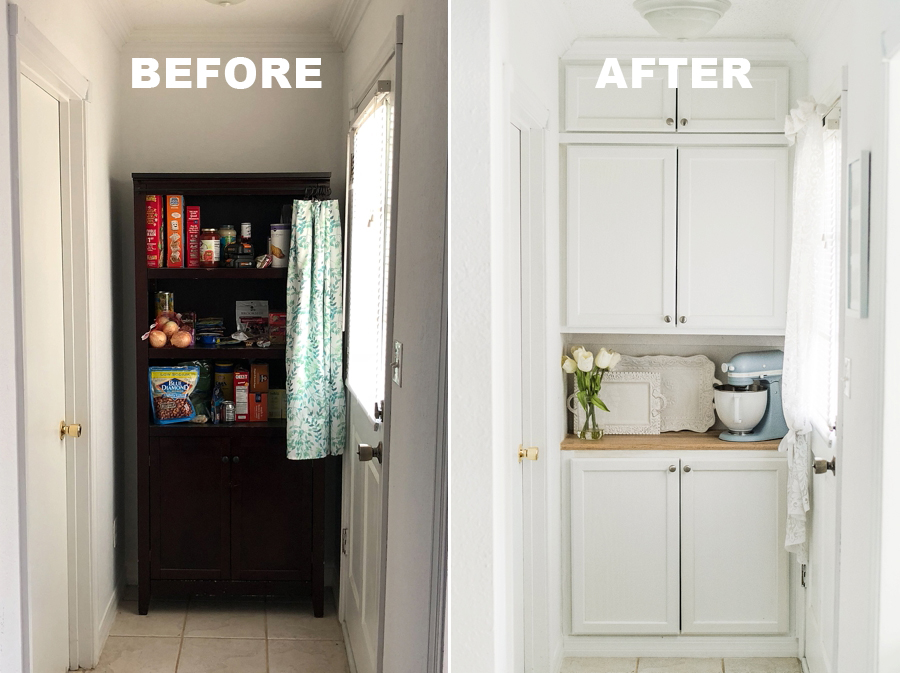
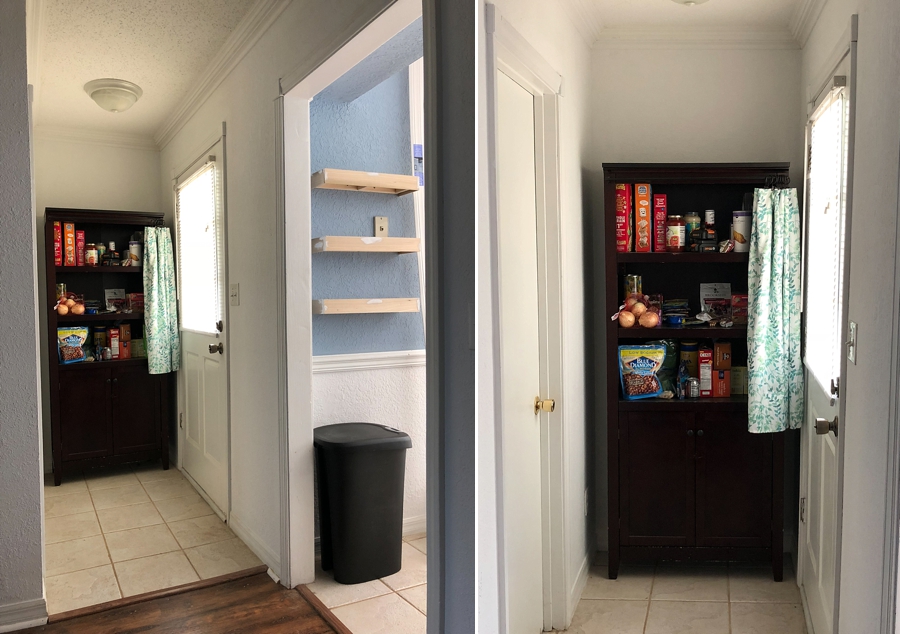
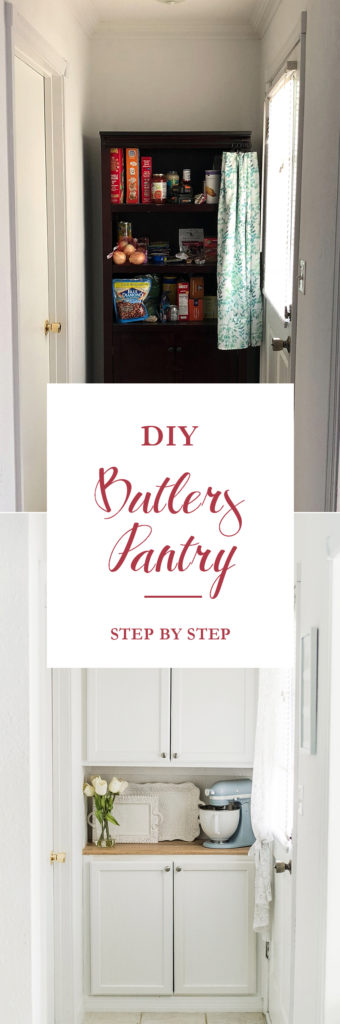
It has been a while since I’ve last blogged a DIY project. I believe it has been since the repurposed kitchen table… So it’s time to share a rewarding project I took on last year! 🙂 When Alex retrieved the keys to his home, we walked in and found a wooden bookshelf that was left behind. It turned out that the previous owner used it for food storage. We inherited the “food pantry” because the kitchen lacked storage for non-perishable items. It caught my eye every time I passed by … and not in a good way. I knew there was a better solution to this. So I built a butler’s pantry!
**Disclaimer: I’m in no way a construction pro, but with the help of many online resources, I was able to make it happen!
Here are 6 simple steps on how I built our butler’s pantry! Enjoy!
How to Build a Butler’s Pantry in 6 Steps
1. MEASURE + DESIGN
I measured the height, depth, and width of the nook and kept them written down in a notebook. Then it was time to dream!!! I loved options that included storage with a countertop. So I moved forward with the butler’s pantry inspiration and sketched out a rough design.
2. SHOP
I researched online for cabinets that worked with my budget and measurements, and found that Lowe’s had the best deals! I tried checking out thrift shops, but it didn’t suit my vision. But don’t turn a blind eye to check out these little shops in your town. Also, don’t forget that the cabinets don’t have to be a perfect fit. Nothing that a little cabinet filler and caulk can’t fix. 🙂
3. MOUNTING THE BOTTOM CABINET
You will need:
Bottom cabinet
Miter saw
Pencil (and your sketchbook)
Taper Measurer
Liquid Nails
Screwdriver
Screws to secure the platform wood pieces in place
2×4 Wood for the platform
Cabinet screws + wall anchors (should come with cabinet)
Stud Finder
Wood Shim Pieces
Leveler
** You can skip the first paragraph below if you bought a bottom cabinet — I bought an upper cabinet and transformed it into a bottom cabinet by following these instructions:
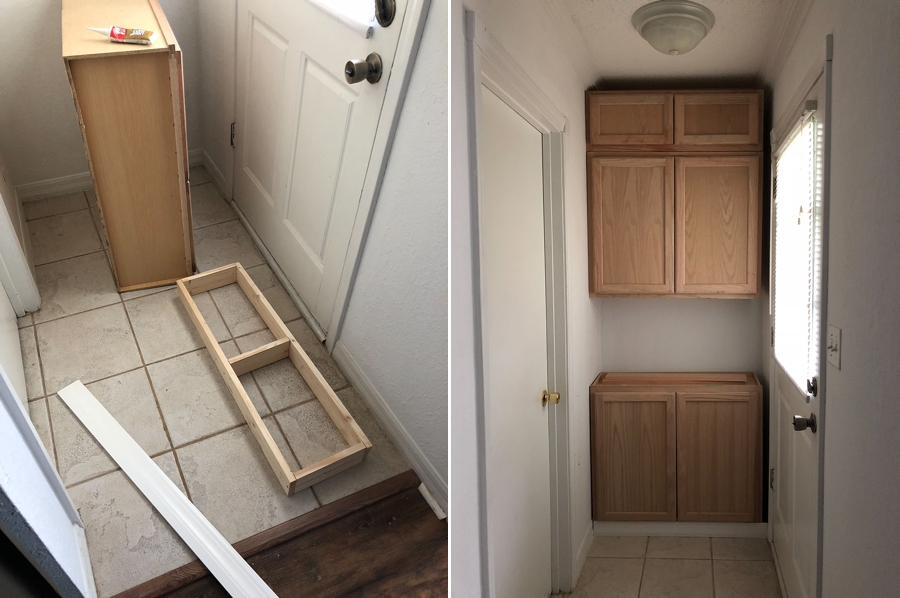
I built a platform box like the right photo below so the bottom cabinet didn’t sit directly on the floor. I used THIS REFERENCE as inspiration and secured the 2×4 wood pieces with screws to create the frame. Then, I liquid nailed it to the bottom of the cabinet. I made sure the width/depth dimensions were smaller than the cabinet because the point is to lift it off the ground about 4 inches and support the weight.
It was then time to show progress! I anchored the cabinet to the wall by using the cabinet screws that came with my cabinets. ** Be sure to use wall anchors if you don’t hit a stud. <= SO IMPORTANT! Also, if it sits away from the wall at all (not all walls are necessarily 90 degrees), you might need to use a shim before you completely secure the back to the wall.
4. MOUNTING THE UPPER CABINETS
You will need:
Upper cabinet(s)
Leveler
Stud Finder
Miter Saw
2×4 “beam” to secure to the wall to act as your leveler
Drywall Screws
Pencil
Measuring Tape
Cabinet screws + anchors
If you plan to have a countertop, plan for about 18 inches in between the bottom cabinet and the large upper cabinet. We had enough room to add a 12″ cabinet at the very top for items we don’t use frequently, which worked great for this space! **Don’t forget about making room for the crown molding.
After I marked where the bottom of my upper cabinet would sit, I attached a 2×4 “beam” that stretched across the width of the wall (like THIS REFERENCE illustrates). I made sure it was leveled and sat at the right height I marked before screwing it into the studs. This “beam” not only helped hold the weight of the cabinet while I screwed it to the wall, but it helped ensure my cabinet was leveled while giving it extra support. I then completed the next big step by anchoring both upper cabinets to the wall!
5. FILL + PAINT
You will need:
Cabinet filler or pieces of wood
Caulk and a Caulk Gun
Paper Towels
Painters Tape
Crown Molding
Floor Molding
Miter Saw
Pencil
Tape Measurer
Hammer
1-1/2″ Finish Nails
Liquid Nails
Screwdriver
Semigloss white paint
Paintbrush
Tarp
Before I was able to paint, I needed to fill in the gaps with trim. I used cabinet filler and even pieces of scrap wood that I was able to cut down with my miter saw. I liquid nailed them in place and I used painter’s tape to hold it up while everything dried.
If you aren’t familiar with cutting crown molding or floor molding, I suggest checking THIS REFERENCE out or call a friend! I used my miter saw to miter the cuts and installed them by nailing the trim to the cabinets. Once in place, I removed the painter’s tape from the cabinets and caulked the heck out of this project to fill in any seam/gap. I love using the caulk gun and then wipe it with my finger for a smooth finish. I discard the excess on paper towels to help with the mess.
While the caulk was drying, I took the cabinet doors off and painted everything with semigloss white paint. I had to paint a couple of coats before I secured them back in place.
6. COUNTERTOP + HARDWARE
You will need:
Countertop (I actually used a solid oak stair tread with a rounded edge on one side — The size was perfect!!)
Liquid Nails
Caulk and a Caulk Gun
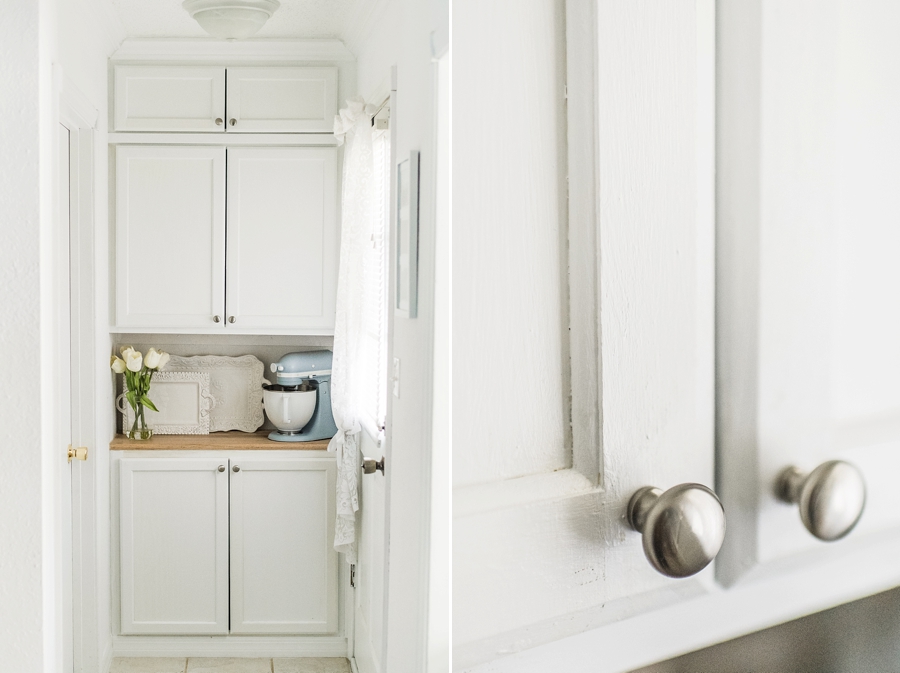
Your choice of hardware — I had brushed nickel knobs on hand!
Pencil
Drill
I don’t know how I got SO lucky finding a piece of wood that worked perfectly. But I found a solid oak stair tread that fit the cabinet dimensions with a little overhang! I liquid nailed it to the cabinet and used caulk where the countertop met the wall.
After I installed the countertop, the final touch left was the hardware! I measured, marked drill holes with a pencil, and drilled through the cabinet doors. If you don’t know how to do it, check out directions HERE!

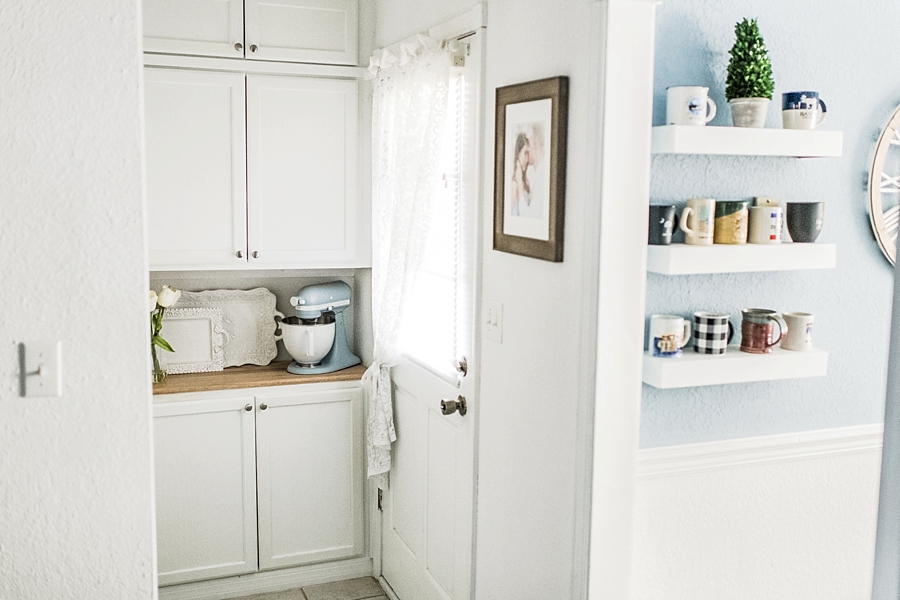
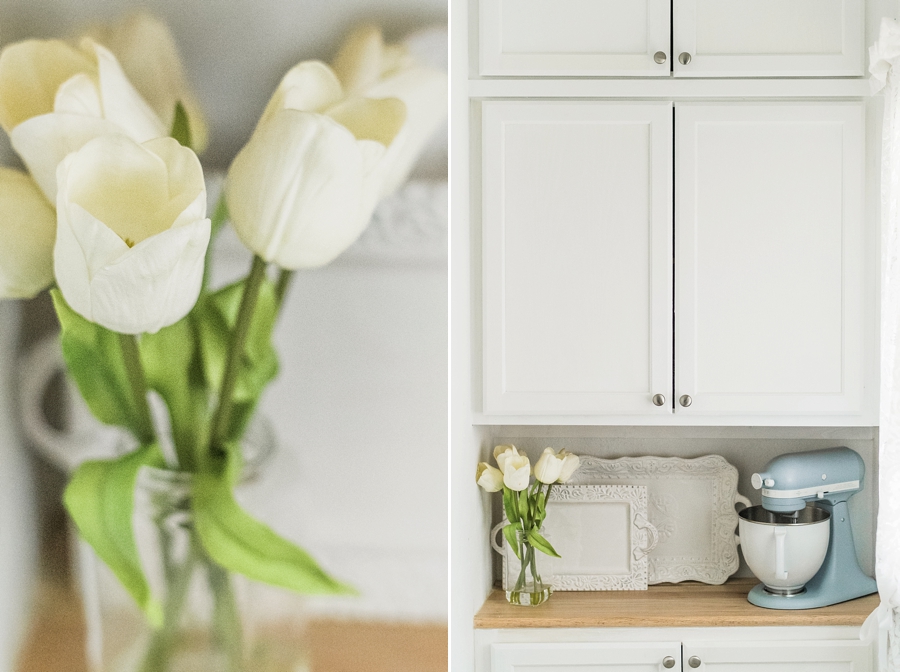
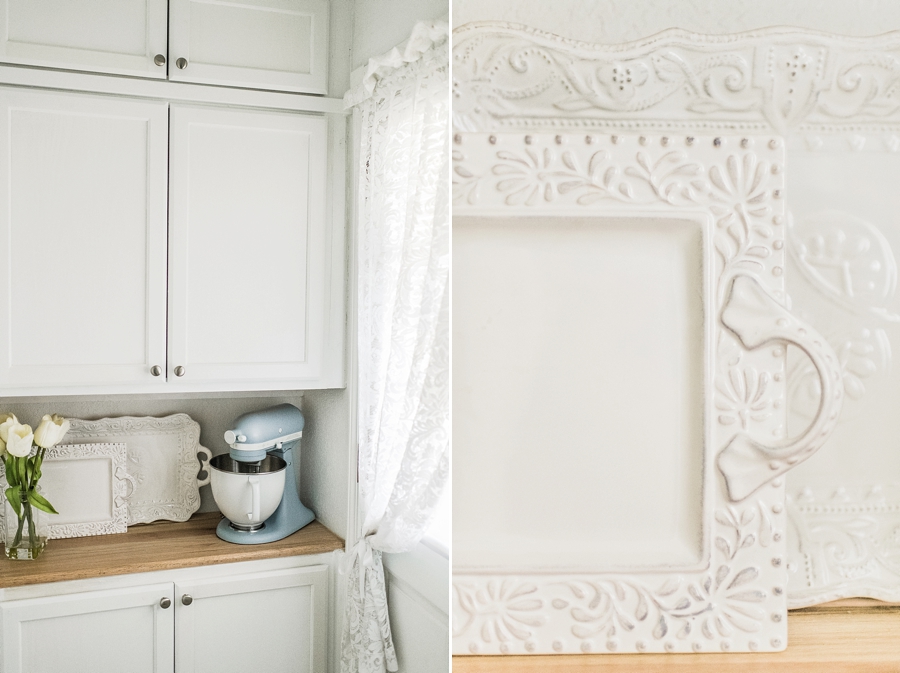
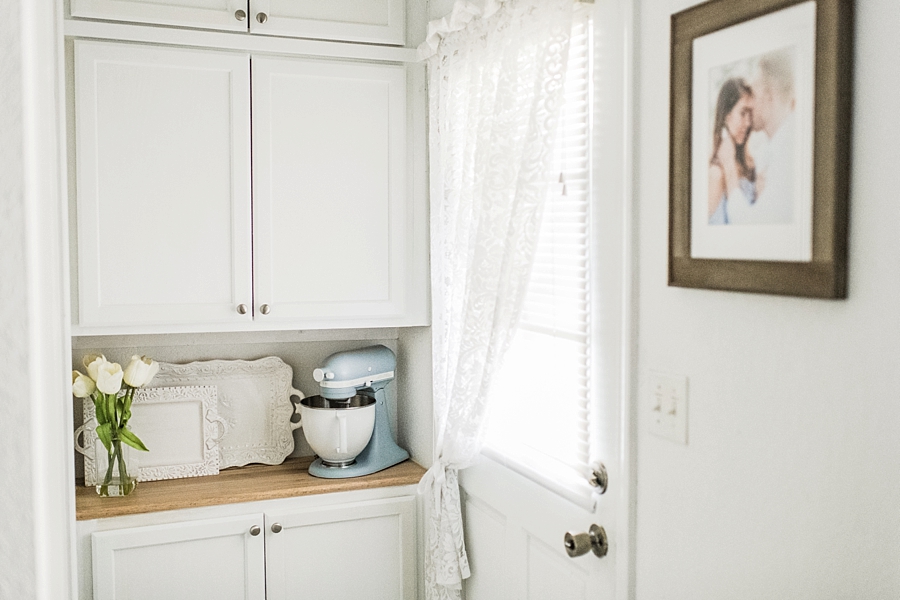
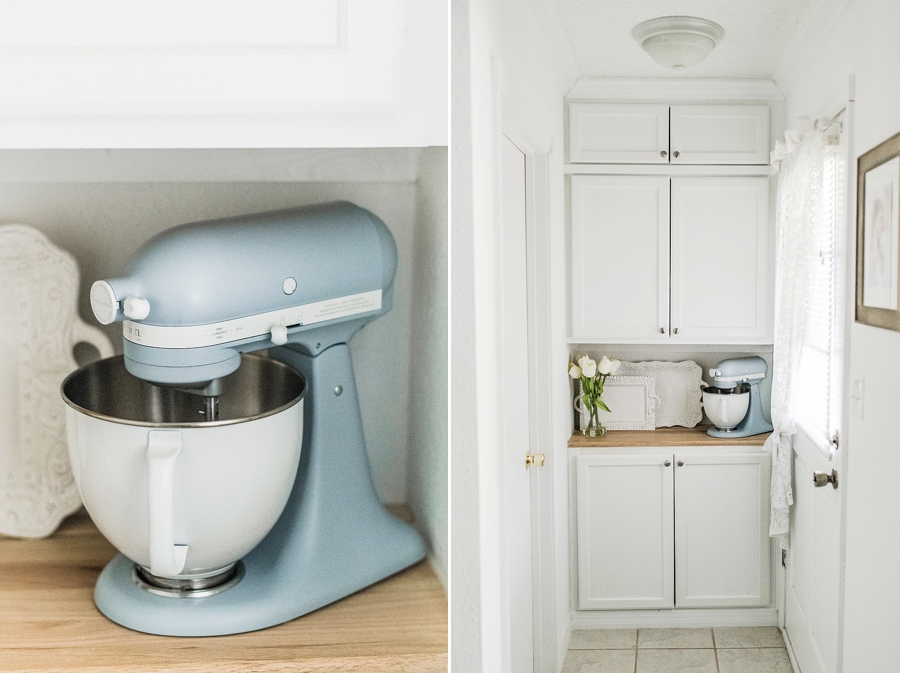
Here are the results!!
This butler’s pantry was the most rewarding project I have tackled to date! Challenges are a great learning experience, even if it means we don’t have all of the answers/plans set out before starting. I LOVE how functional and aesthetically pleasing this pantry is to the eye!! Not to mention, we added value to our home by this addition. WORTH IT. Can you imagine creating your own butler’s pantry in just 6 steps?
Is there a place in your house you can build something that will functionally serve you better? I dare you to dream big!!!

Want the Look?
Misty Blue Kitchen Aid
Fake Tulips
White Decorative Dishes


+ COMMENTS
add a comment