


I love seeing something for its structural beauty and not necessarily for its appearance. I encourage you to do the same next time you are in an antique/thrift/consignment shop! It’s so much fun knowing that the sky is the limit when you have the resources! Before moving into my house a little under a year ago, I browsed through Habitat for Humanity’s Restore more than once a week. You never knew what would come up! Some days I would walk out empty handed and other days I felt like I hit the jackpot! Their store is great because it ranges from donated furniture to old salvaged house parts. I cannot wait to share more things around my home that was bought from there!
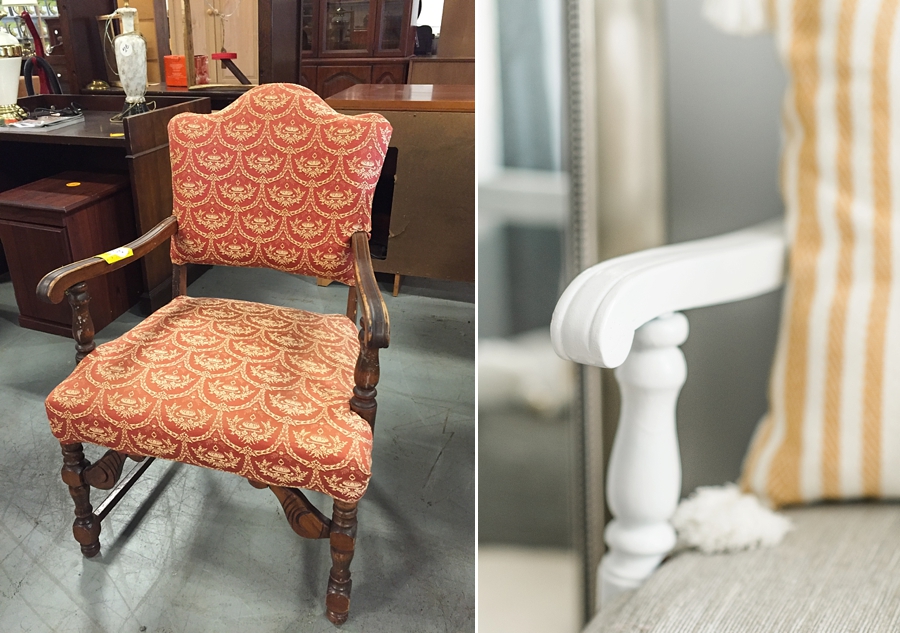
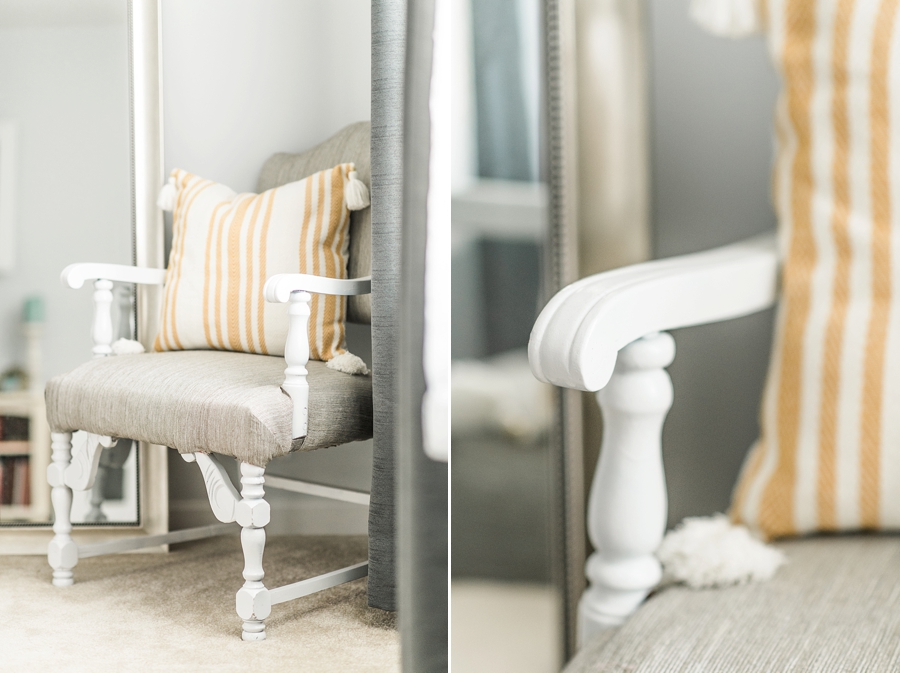
This project was a bit different for me, but I love to share my experiences with you! I found this chair at Restore for $25 that needed some love and an update. I pictured it as an accent chair in my bedroom, so the color scheme was desperate to be neutralized. Fortunately, I had just enough fabric leftover from my dining room project (that blog post is for another day!) so I just needed to purchase two cans of white wood spray! If you want to do this yourself, the fabric amount will vary depending on the size of your chair.
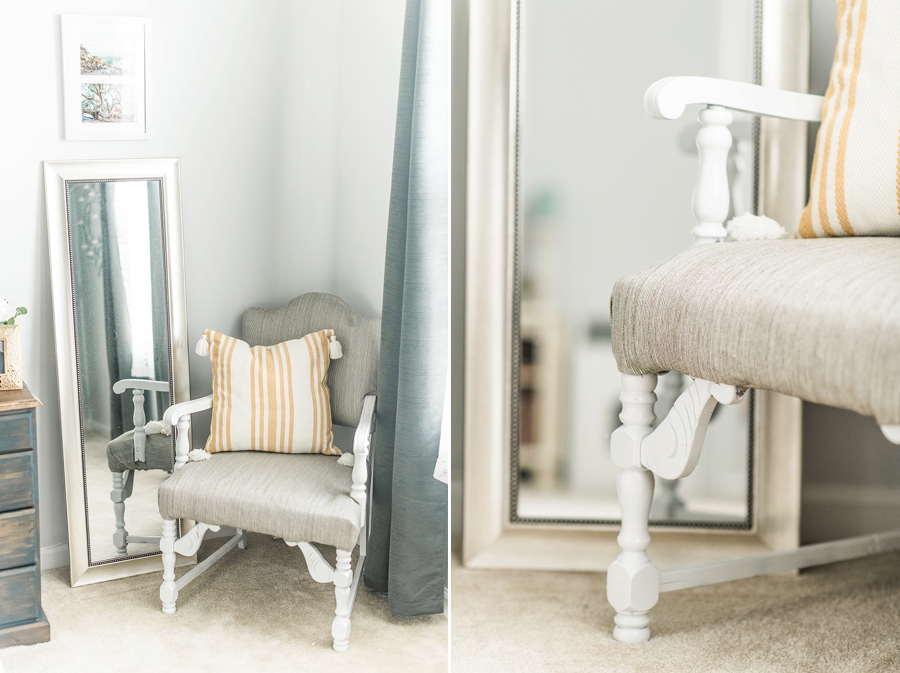
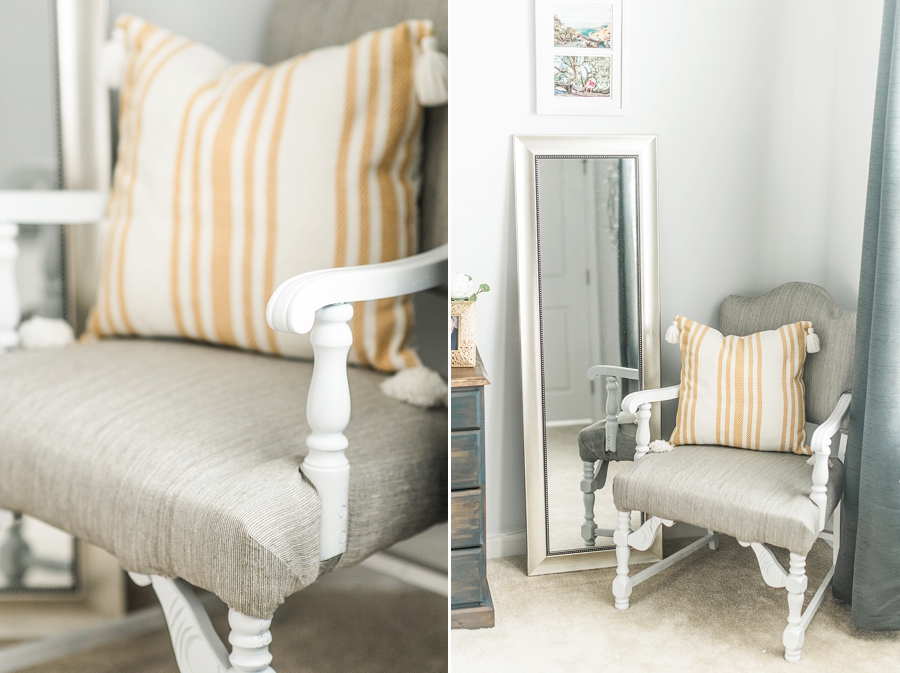
After I glued/fixed some of the little cracks in the chair before spray painting. Once it was good to go, I moved forward with reupholstering. Note … I am NOT a reupholsterer, so I kind of cheated when it came to this part of the project. I tried taking off the red fabric, but there was stuffing directly underneath so there was no way I was going to strip it down that much. So instead, I covered the existing fabric with the gray fabric. Totally worked! It’s important to have your staple gun close by, but the strategy is to hug the previous fabric with the new fabric. I stapled the new fabric under the chair where you cannot see the seams. The trickiest part was around the chair arms because I had to make a little slit in the fabric and wrap the fabric around without any crease, while still folding the fabric to not expose the edges. After I started playing around, it came together! 🙂 Now I have a cute accent chair in my bedroom corner that blends nicely with the space!
If you are going to do this yourself, you will need a staple gun, scissors, fabric and spray paint (if you need to paint the wood). It’s fun seeing the before and after photos! Check it out!!
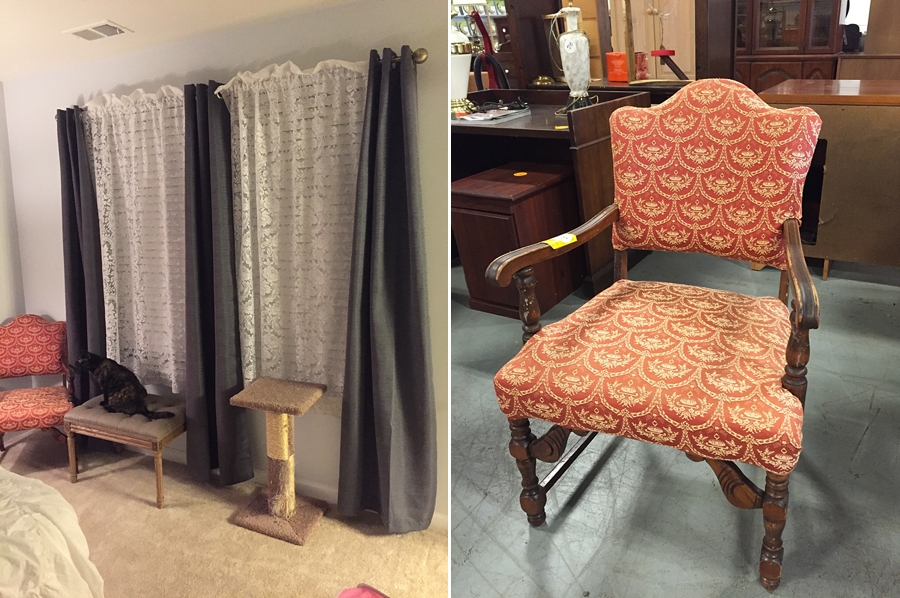
BEFORE
AFTER


+ COMMENTS
add a comment