


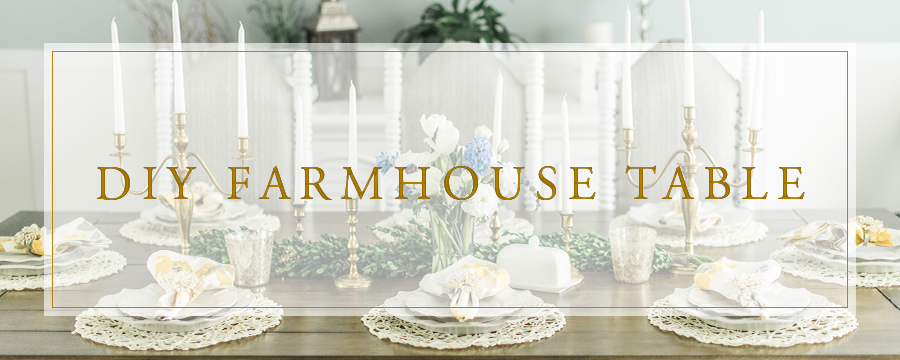
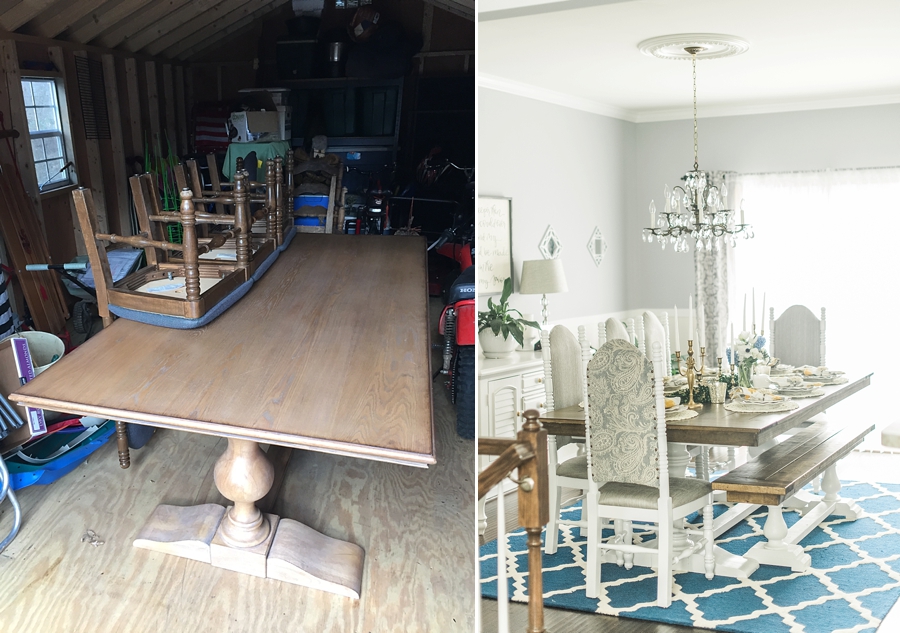
I have had many family members, friends and viewers ask how did I transform a plain table to the farmhouse look. If you missed the blog post where I showed the before and after photos, you must check out THIS blog post before reading the information below. 🙂 It’s one of my all time favorite projects I have taken on to date!
Today, I’m sharing how I managed to tackle this project by myself, as an armature wood builder. Before I do dive in, I altered the directions below from what I did because … well, I learned a lot! I wrote out the altered directions below so you might have better results! 🙂
Tools you will need for this project:
Table
Wood
Pencil + Paper
Measuring tool
Miter Saw
Dust Mask
Eye Protection
Sander
Wet Cloth
Annie Sloan Paint + Paint Brushes
Minwax Pre-Conditioner
Minwax Stain
Minwax Polyurethane
Oil based paint brushes for staining
Clamps
Let’s dive in!!
1)Find a piece of furniture you want to repurpose, whether it’s a coffee table or a dining room table, you can do this to basically any table-like surface. I recommend painting the bottom part of the table because the majority of the time, it’s going to be SO difficult to match the wood color to the bottom half. I decided to paint my table white with the help of Annie Sloan paint! I’m not going to dive in too much about how to paint the furniture, but they have countless tutorials on the website you can check out HERE! It’s the best furniture paint out there. 🙂 Not to mention, it’s SO easy to use!!!
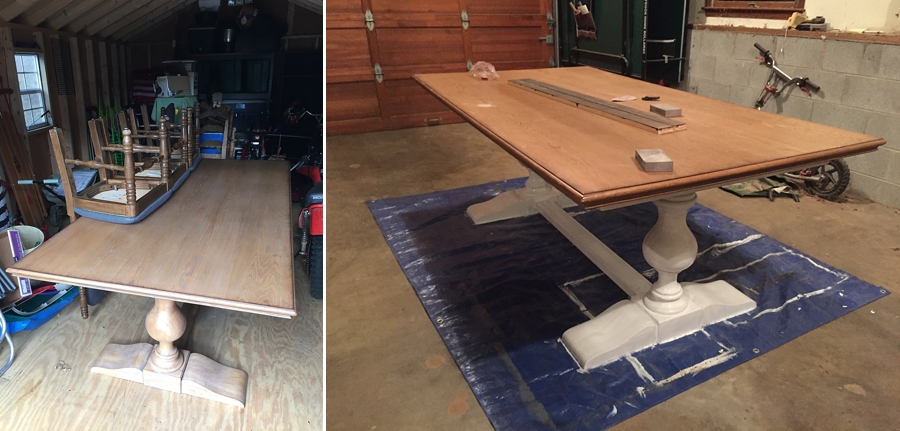
2) Measure the table surface (W/H). I made sure to add an additional four inches to the width and the height, so there was a two-inch overhang around the edge of the table in every direction. It’s also good to extend the surface so you can build a lip if you need to. I always recommend to sketch out a drawing of your surface, so you have a visual with notes.
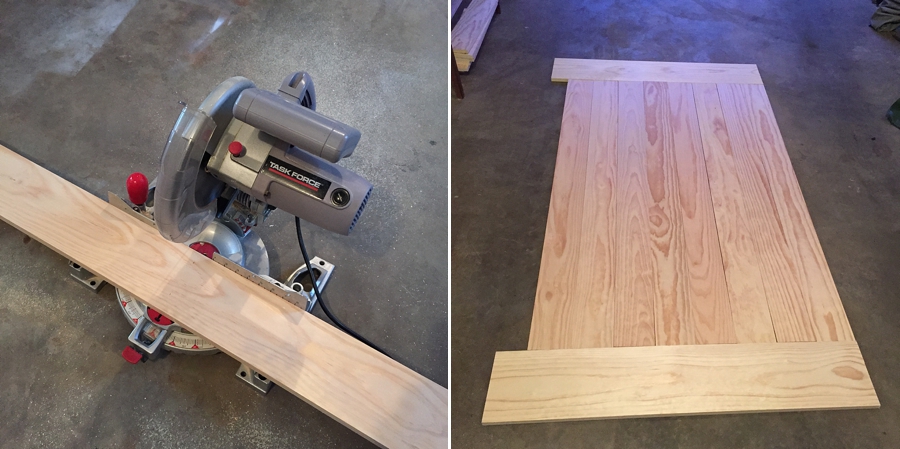
I envisioned a big piece of wood for the ends of the table and thinner vertical pieces stretching from end to end (like you see below). When you are figuring out what size/type of wood to purchase, I went to Home Depot and bought beautiful pine wood boards (avoid the lower grade boards because they are flimsy, chipped, rough and uneven). If you are unfamiliar with precut boards, make sure you take into account the actual wood size. When you think you are purchasing a 1×10 board, you are actually purchasing a 3/4″ x 9 1/4″ board! Be sure to check out THIS site for actual board dimensions. The dimensions will be important when you are sketching out your plans and figuring out how to puzzle piece boards together! For my size table, I purchased two 1×10 boards for the ends, eight 1×6 boards for the vertical boards and one 1×4 vertical board to fill in because another 1×6 was too wide for the vertical space.
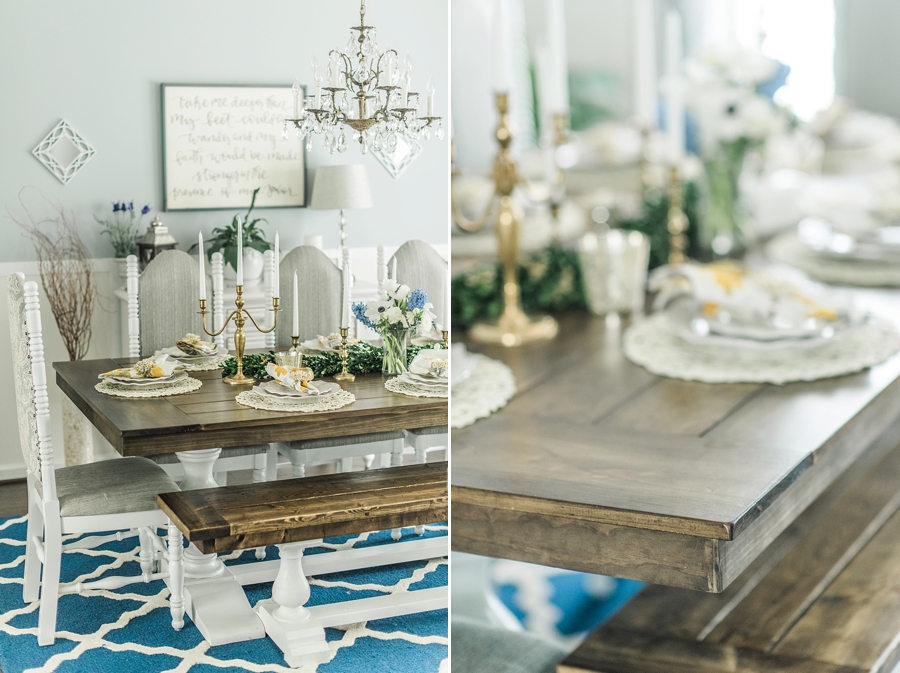
** Something to think about — If you were to lay wood directly on the table top surface, will you still see any traces of the original table surface from the side? If yes, you can either paint it white, so it blends with the bottom part of the table, OR you can build a wooden lip like I had to do. Check out the final results of my table to understand what I did around the edge HERE! If you do decide to build a lip, consider how wide of a board you will need to cover up the table edge. I bought 1×2 pine boards to wrap all the way around the table.
3) After you bought the wood, it’s time to CUT! Remember to measure twice, cut once! 🙂 After you cut the boards, lay them out and make sure everything lines up.
** When/if you are cutting boards for the lip of the table, a miter saw is a MUST! Measure the table length and mark the two points on your board with enough room to miter cut at a 45-degree angle. Again, draw out a sketch to make sure your angles and dimensions are correct. After the boards are cut, hold up the boards against the table to make sure the corners match up and are flush against the edge.
4) Sand down the wood so when it’s time to stain, the stain will quickly soak into the wood! It’s important to sand now before you glue them down because you want to take the shine off the wood, so it’s raw and natural! Be sure you are wearing a proper dust mask, so you aren’t inhaling the wood particles.
5) This is where things get different from what I did below. I stained the wood before gluing down the boards, but if I were to do this project again, I would glue down the boards and then stain instead. This way, you have a chance to sand down the wood after it’s glued down for an even surface while filling in the gaps with wood filler.
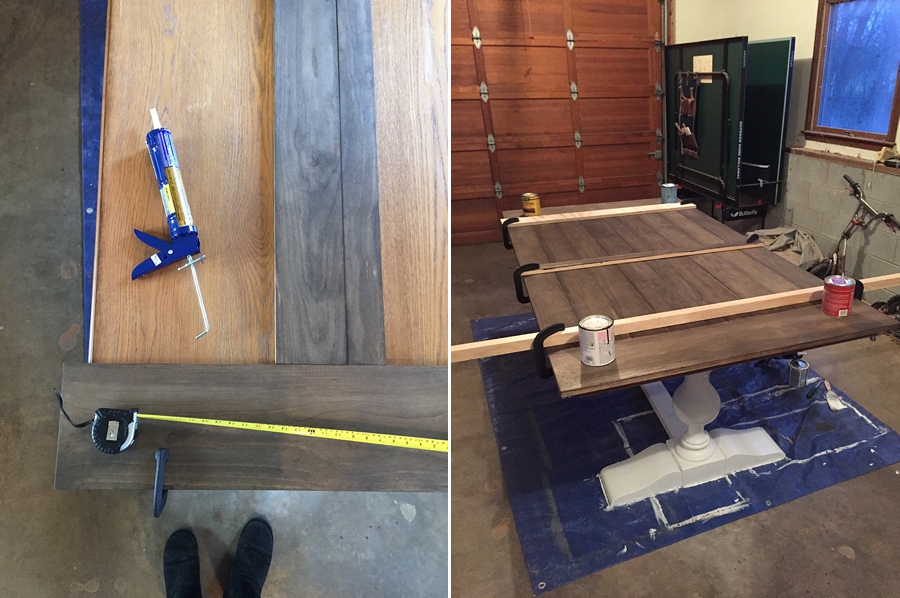
So with that explanation above, lay down the wood on the table surface and make sure everything is lined up. It’s time to glue down the wood! I used Liquid Nails with a caulk gun, and it worked like magic! Start from the middle and work your way out to ensure everything is even. As you see below, I used paint cans, clamps with wood stretching across the table to secure down the boards. I let the table sit for 48-hours to ensure it was completely dry.
** If you are building a lip around the table edge, wait until the surface boards are completely dry. Remember how we purposefully added a two-inch overhang? Glue the lip pine boards to the bottom of the overhang, so it’s snug against the table edge. 🙂 Again, clamp them to the top of the table so it has time to set. Leave for 48-hours.
6) Before you do any staining, be sure to sand again and wipe clean with a wet cloth, so you have an even surface. Use Minwax stainable wood-filler so you can fill in any gaps in between the boards, including the corners of the lip (if you built one). Gaps aren’t necessarily a bad thing when it comes to the rustic look, but there are a few spots on my table where I wish I fill in. Now it’s time to stain, but be sure to follow the instructions on the cans. Use Minwax Pre-Stain Wood Conditioner, and after you made it through those steps, it’s the fun part! I bought Minwax Wood Finish Stain in the Dark Walnut color and love the immediate results! Again, follow the steps on the can! After the stain is dry, follow up with a Minwax Polyurethane to make the surface come to life!
You’re DONE!! See, that wasn’t so bad. 🙂

If you want to learn about how to reupholster dining room chairs, that’s for another blog post!! 🙂


+ COMMENTS
add a comment